Authorizing an Account
Authorize an account from the current Okta org
This procedure explains how to create a new connection for your current Okta org. This is the Okta org you used to launch this Workflows environment.
If you want to create a new connection for a different Okta org, see the section Authorize an account from another Okta org below.
Requirements
To perform this procedure:
- You must be assigned to the Okta Workflows OAuth app.
- You must have Super Admin credentials.
You also need the following information for authorizing your Okta account:
- Domain: Your Okta org domain. If the URL of your Okta org is
https://yourcompany.okta.com, then your domain is yourcompany.okta.com.
- Client ID and Client Secret: The client ID and client secret from your Okta Workflows OAuth app. To find this, go to Okta Admin Console > Applications > Okta Workflows OAuth app > Sign On tab > Sign On Methods.
Procedure
Back in Okta Workflows Console,
- Go to Settings.
- Click +New Connection. All available connectors appear.
- Select the Okta connector. New Connection window appears.
- In the New Connection window, enter the Connection Nickname. This is the display name you want to appear in your list of connections.
- Enter Domain, Client ID, and Client Secret.
- Click Create.
The new connection appears in the Connections list.
Authorize an account from another Okta org
This procedure explains how to create a new connection for an Okta org different from your current org.
If you want to create a new connection for the current Okta org, see the section Authorize an account from the current Okta org.
This task includes the following procedures:
- Create an OpenID Connect web app in the target Okta org
- Configure the OpenID Connect web app
- Authorize an account from the target Okta org
1. Create an OpenID Connect web app in the target Okta org
In the Okta Admin console of your target Okta org,
- Go to Applications > Applications > Add Application.
- Click Create New App. Create New App pop-up window appears.
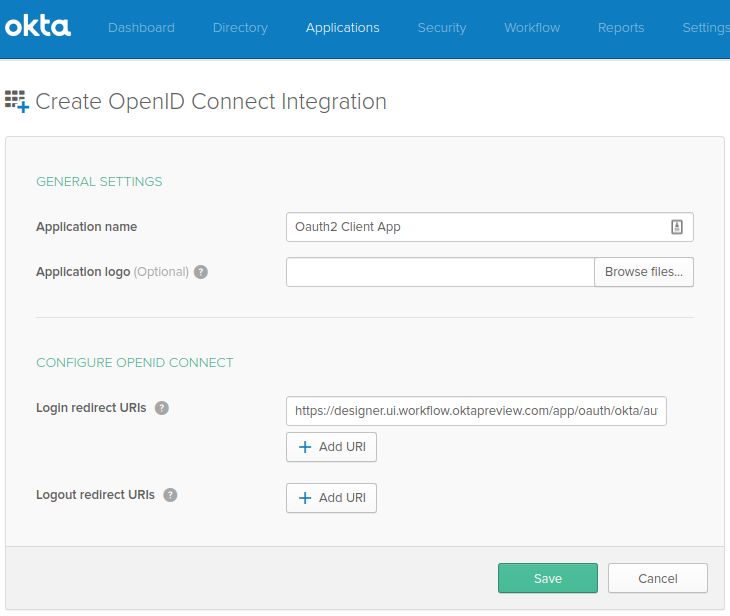
- In the window, select Platform as Web and Sign-on Method as OpenID Connect. Create OpenID Connect Integration page appears.
- On the page, enter your Application name. This is the app display name.
- Enter a Login Redirect URI for the app.
The URI depends on the domain of your Workflows instance. For example, if your Workflow URI is
https://designer.ui.workflow.oktapreview.com, then your redirect URI is https://designer.ui.workflow.oktapreview.com/app/oauth/okta/authorize.
- Click Save.
The app is created and appears on the Applications page.

In the Okta Admin console,
- Go to Applications > Applications.
- Select your newly created application.
- On the General tab, click Edit.
- In the Allowed Grant Types list, select Refresh Token.
- Click Save.
- Select the Assignments tab, and then click Edit.
- Assign the app to the appropriate users. You can assign it to individual people or to groups. Note: The user must be a Super Admin.
- Save your assignments.
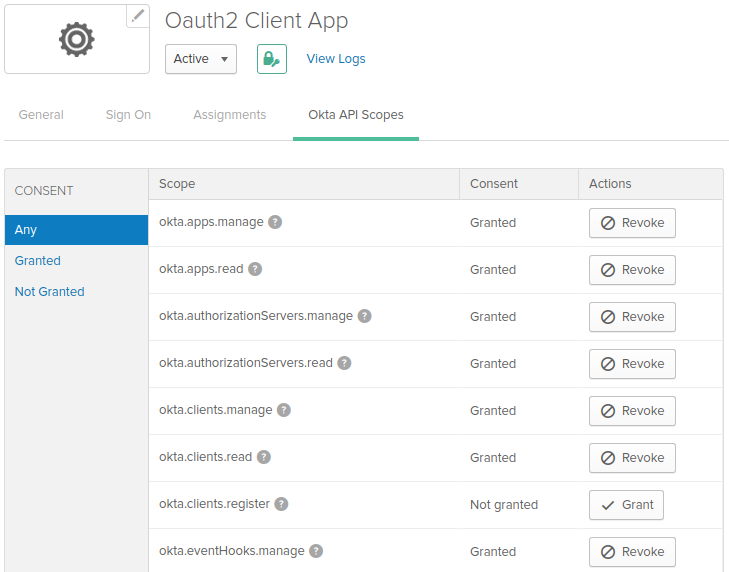
- On the Okta API Scopes tab, grant consent for the scopes required for your use cases.
- Click Save.
The app is now configured and an assigned user can create a new connection for this org.

3. Authorize an account from the target Okta org
Requirements
To perform this procedure:
- You must be assigned to the OpenID Connect web app created in the previous procedures.
- You must have Super Admin credentials.
You also need the following information for authorizing your Okta account:
- Domain: Your Okta org domain. If the URL of your Okta org is
https://yourcompany.okta.com, then your domain is yourcompany.okta.com.
- Client ID and Client Secret: The client ID and client secret from your OAuth2 app. To find this, go to Okta Admin Console > Applications > Your OpenID Connect web app > Sign On tab > Sign On Methods.
Back in the Okta Workflows Console,
- Go to Settings.
- Click +New Connection. All available connectors appear.
- Select the Okta connector. New Connection window appears.
- In the New Connection window, enter the Connection Nickname. This is the display name you want to appear in your list of connections.
- Enter Domain, Client ID, and Client Secret.
- Click Create.
The new connection appears in the Connections list.


