This Flow activates each time a new contact is added to your Office 365 People.
Outputs
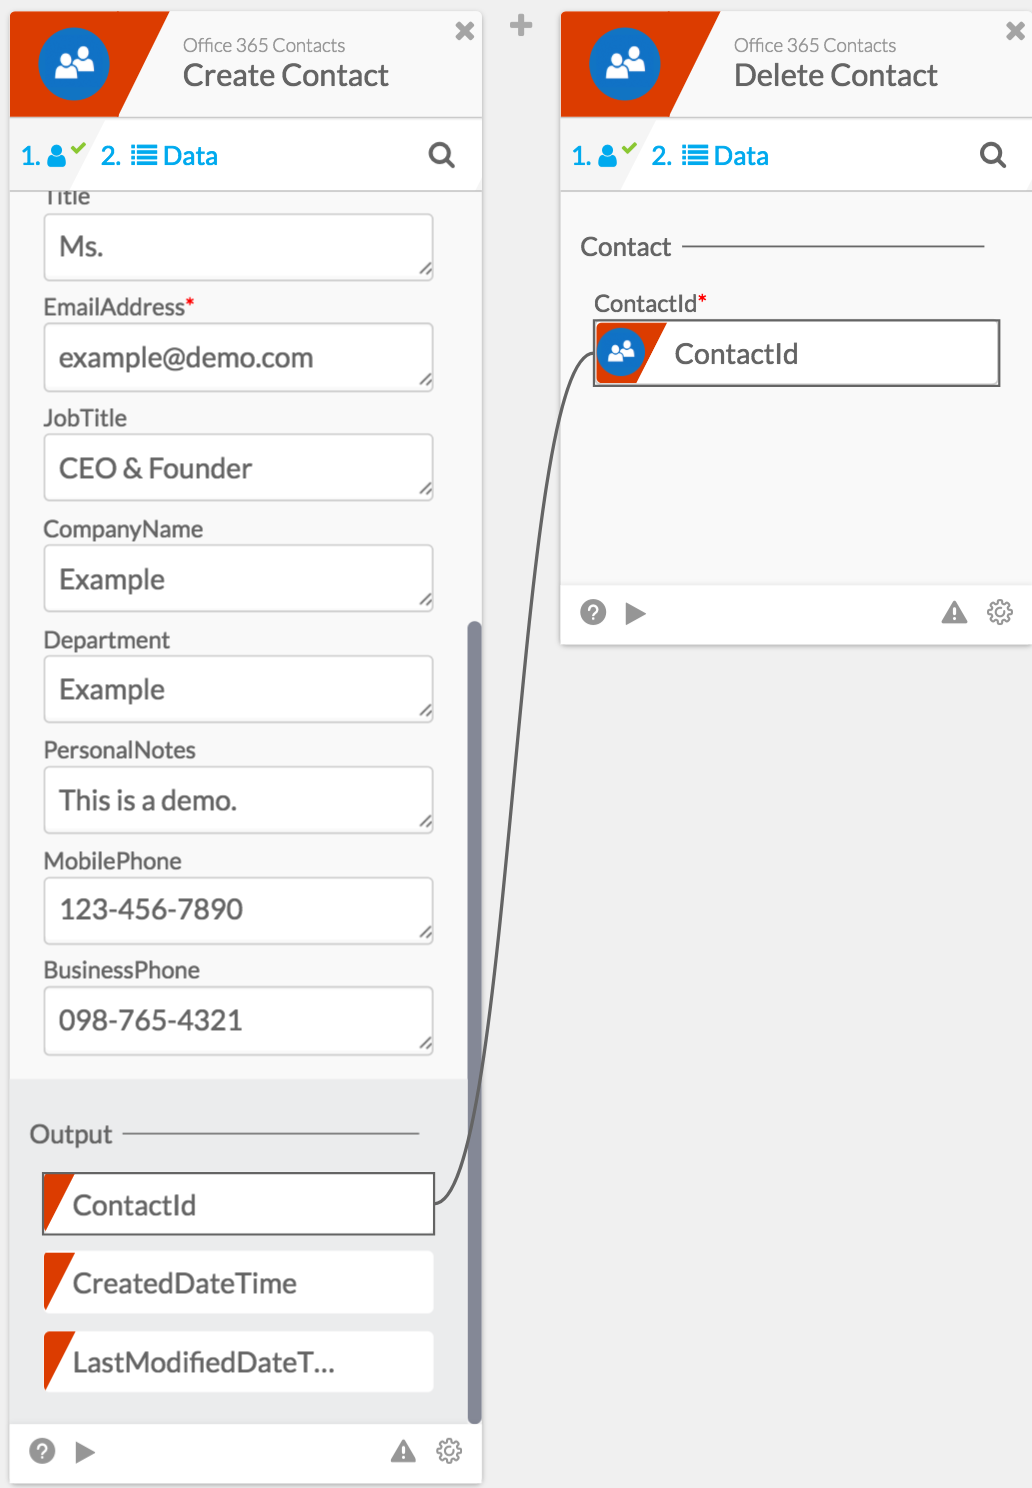
Contact:
- ContactId (text): The unique ID of the new contact. This can be dragged to other cards to be used as identification.
- DisplayName (text): The name that will be displayed in your Office 365 contacts.
- GivenName (text): This name will show up as the first name of the contact.
- MiddleName (text): This name will show up as the middle name of the contact.
- Surname (text): This name will show up as the last name of the contact.
- Initials (text): the initials of the contact, for example John Cardholder Doe’s initials would be JDC.
- Title (text): The contact’s title, for example, Dr., Mrs., Mr., or Sr.
- Email Address (text): the email of the contact.
- JobTitle (text): the job title of the contact.
- CompanyName (text): the name of the company where the contact is employed.
- Department (text): the department the contact is employed in.
- Birthday (text): the Birthday of the contact.
- PersonalNotes (text): any personal notes about the contact.
- MobilePhone (text): the contact’s personal phone number.
- FolderID (Number): the ID of the folder the contact is stored in.
- CreateDateTime (text): The exact date and time of the contact’s creation are returned.
context
- Execution ID (text): The unique identifier for the execution of the Flow.