Start your Flow whenever someone mentions your bot by name in a group post (e.g. @YourBotName). After adding the New Bot Mention card to your Flow and authenticating it, you will need to follow these steps to manually configure the webhook in Workplace:
- Save your Flow and turn it on (you do not need to have other cards in your Flow yet, you can come back and add them later).
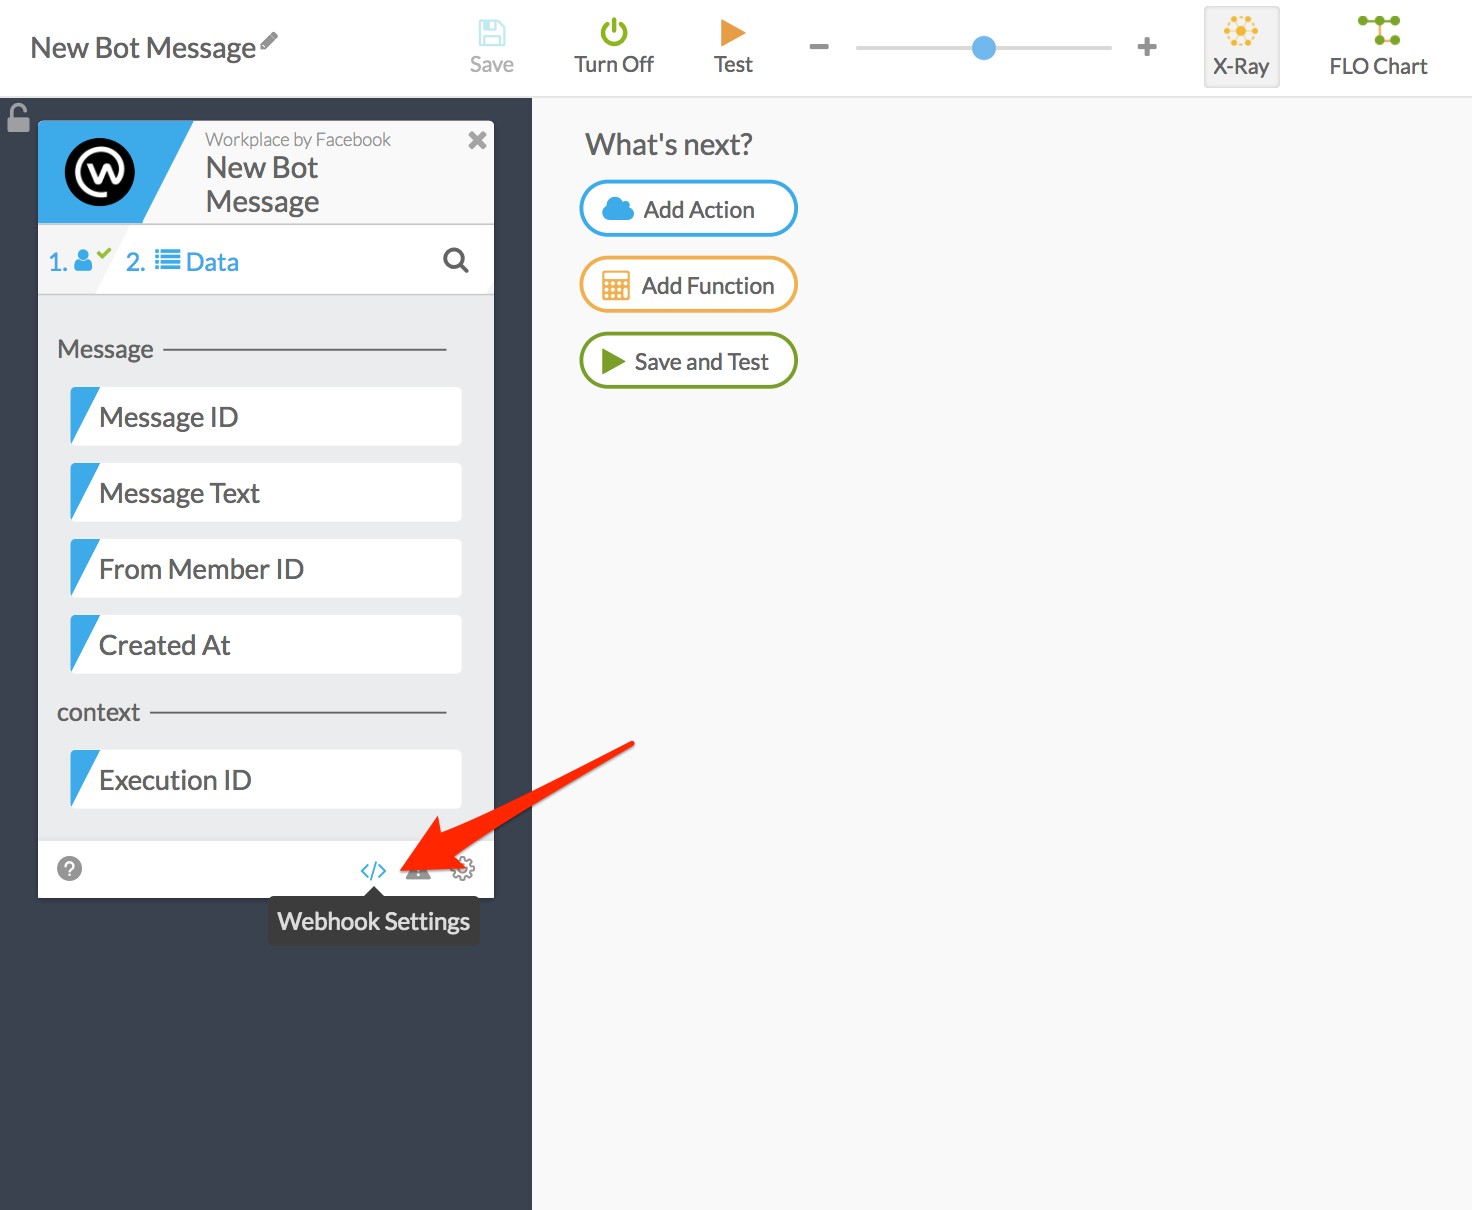
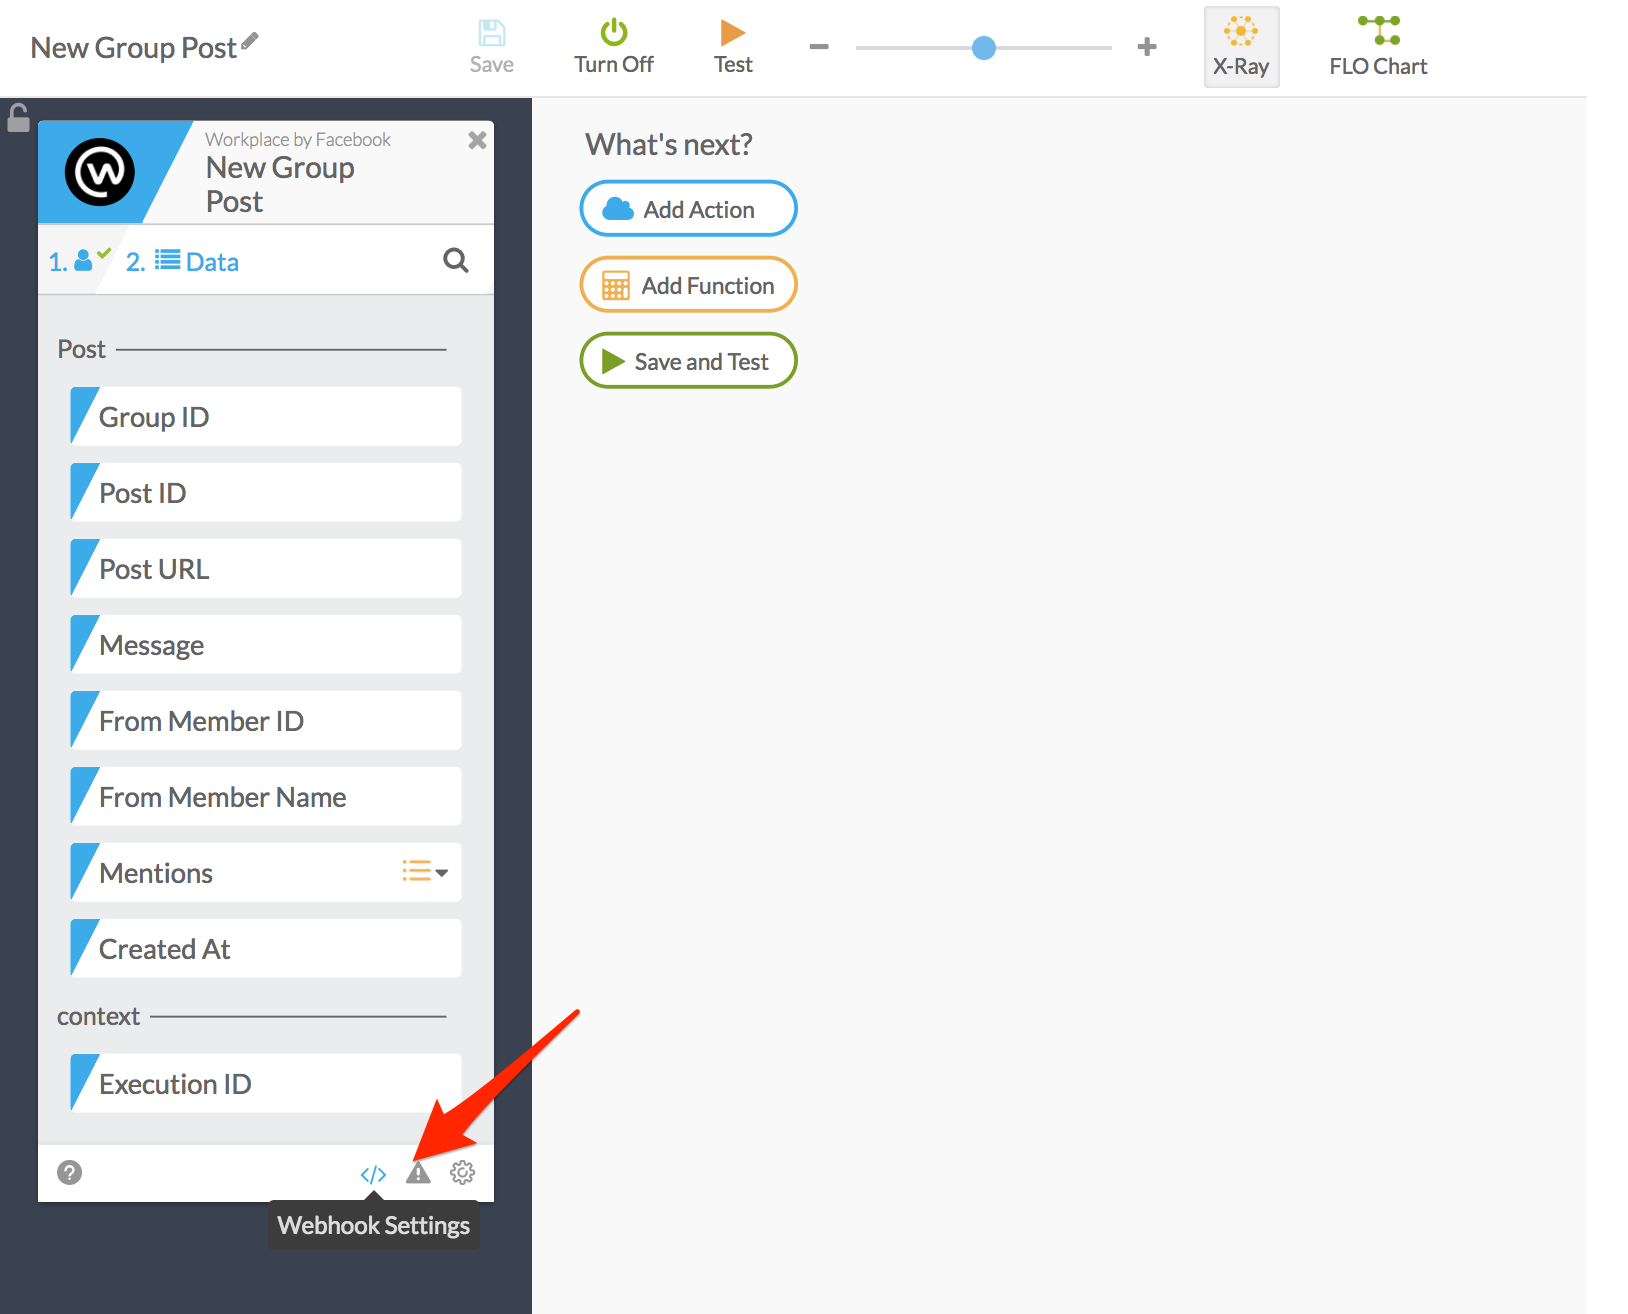
At the bottom of the New Bot Mention card, select the “Webhook Settings” icon.
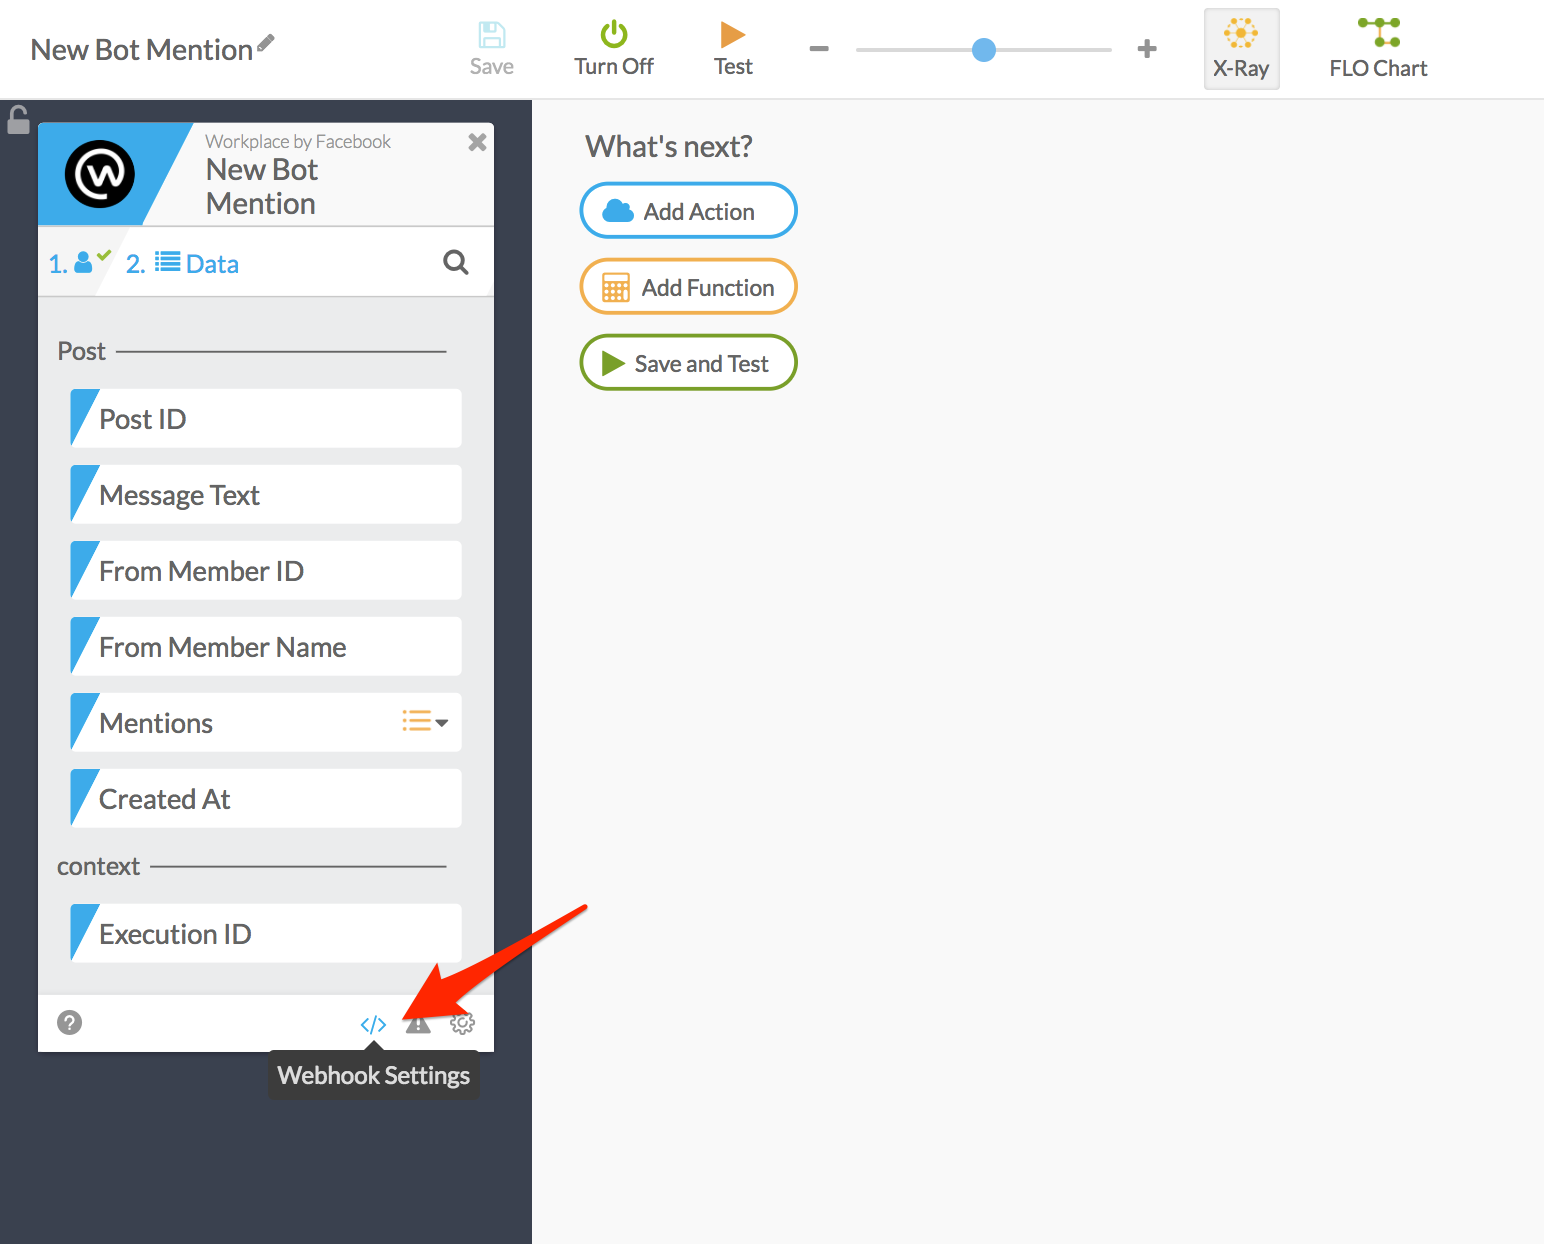
This brings up a dialog with the webhook URL. Click copy.
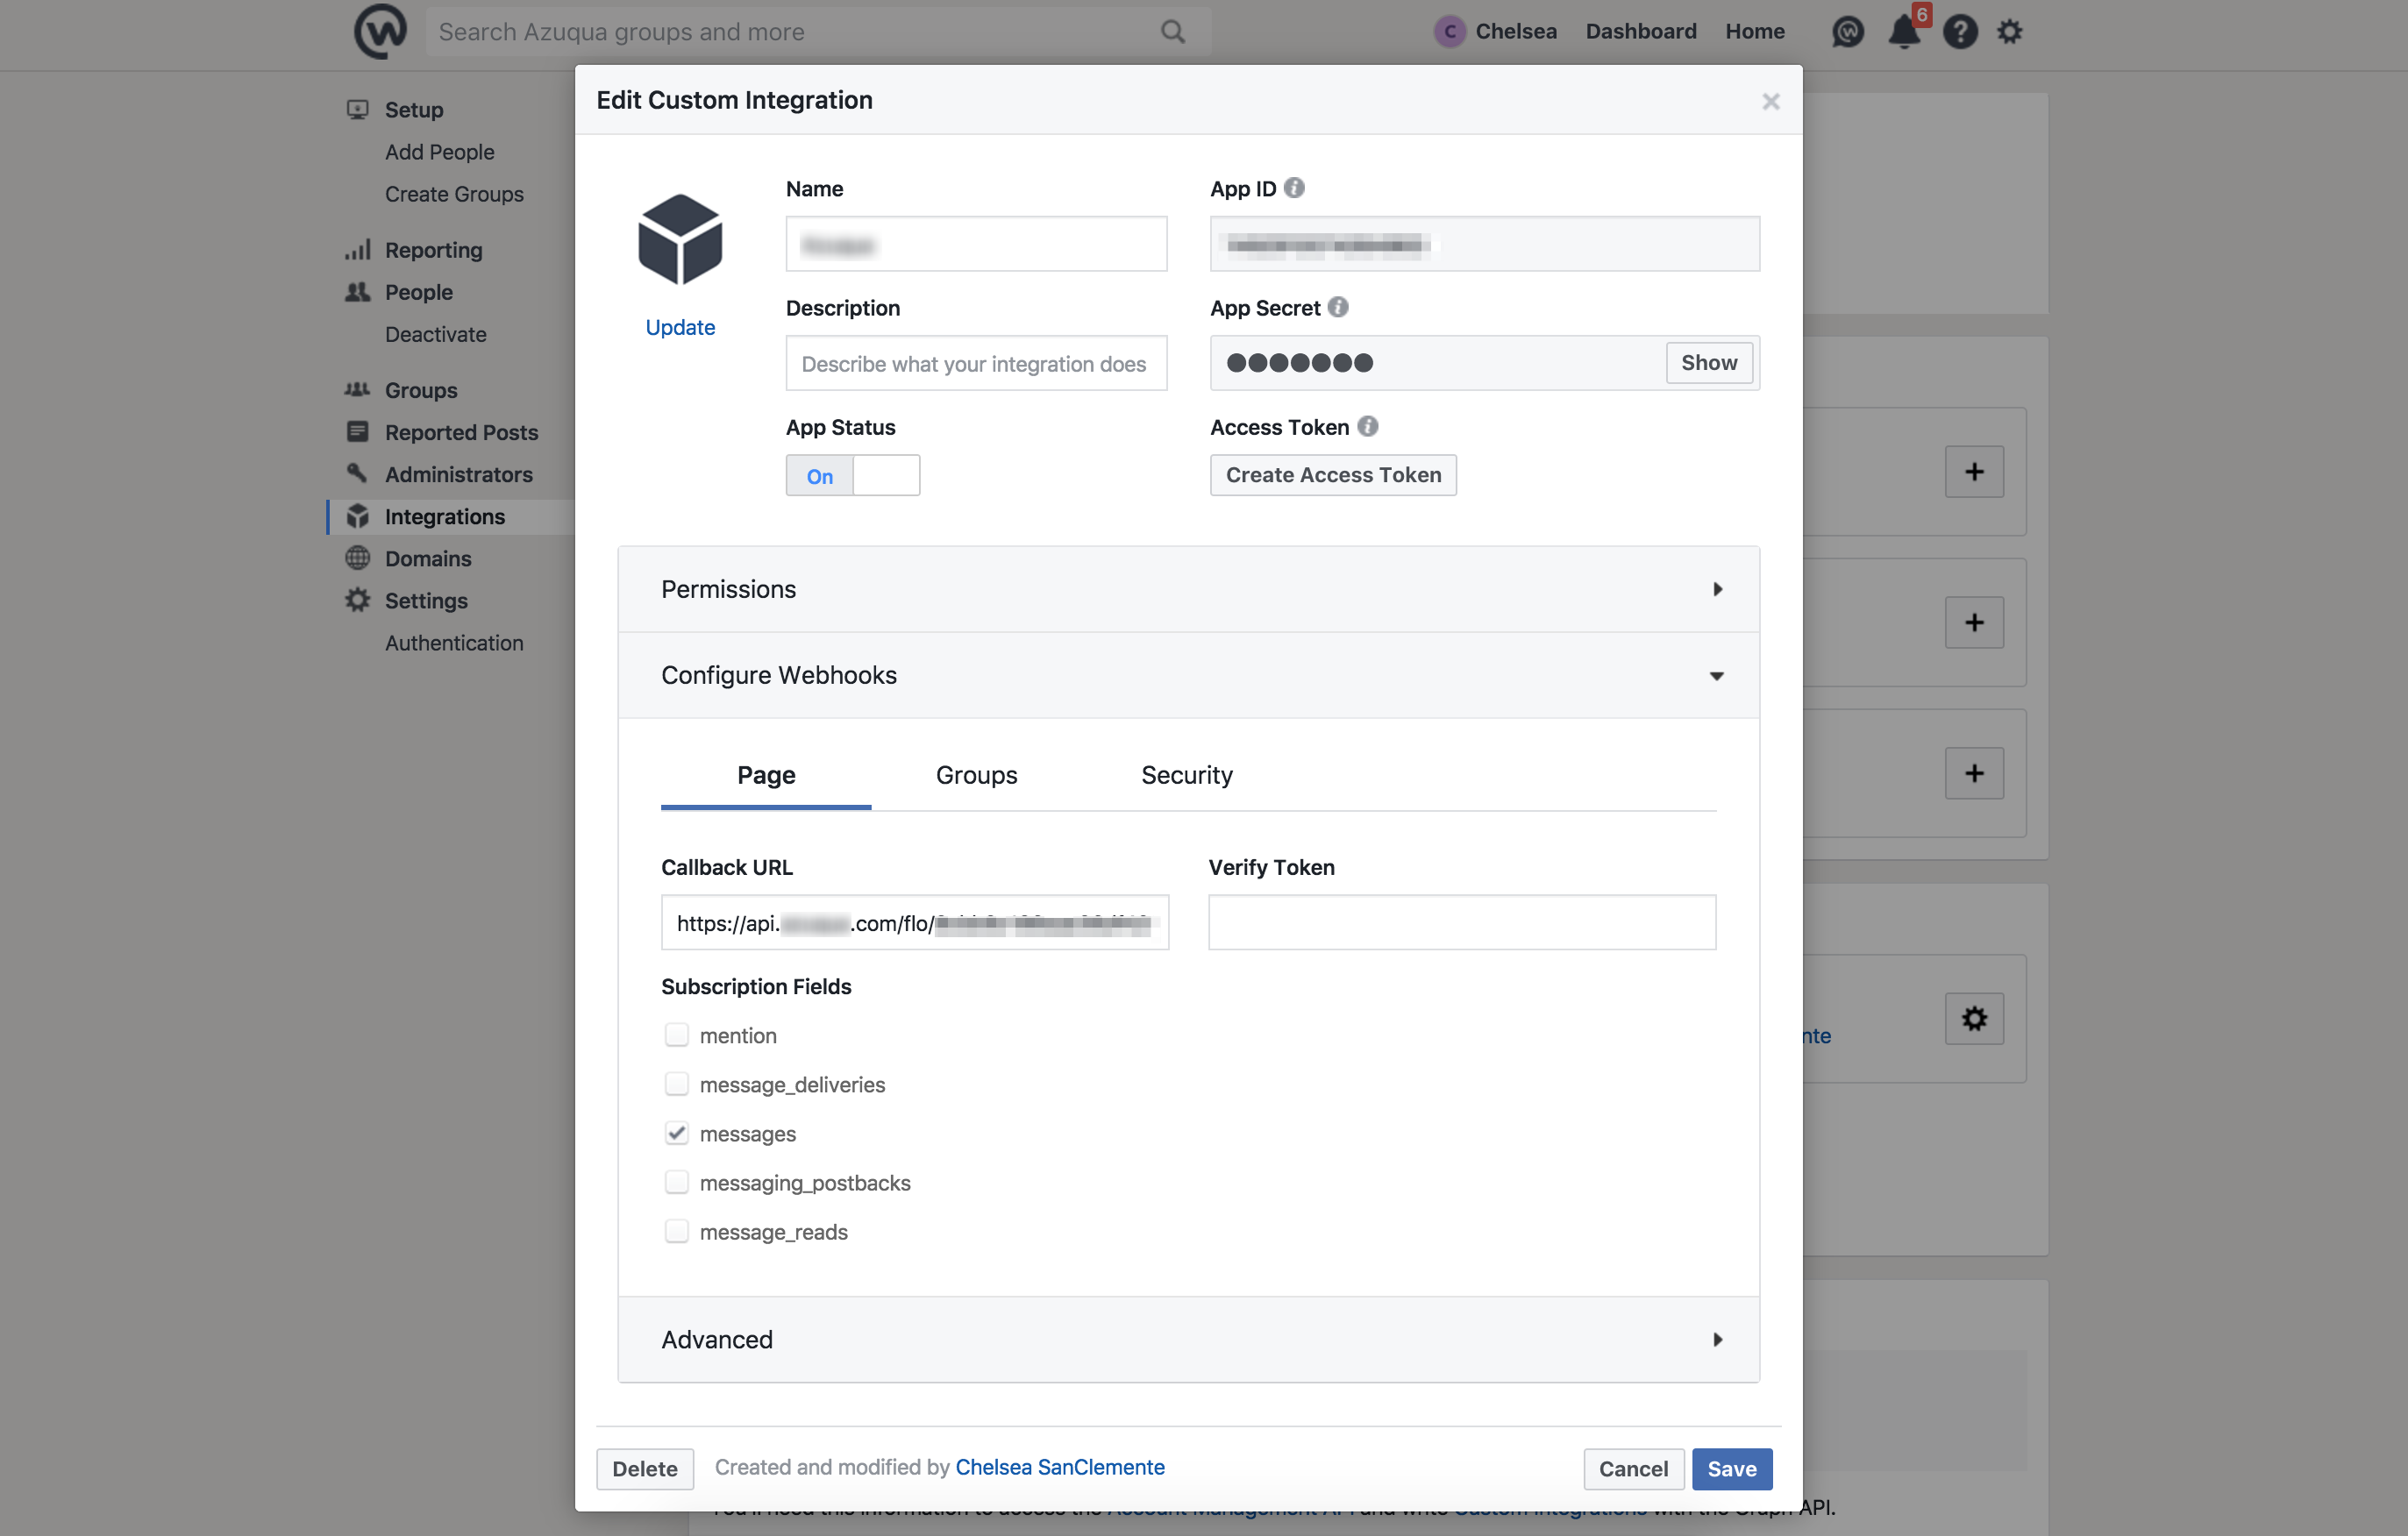
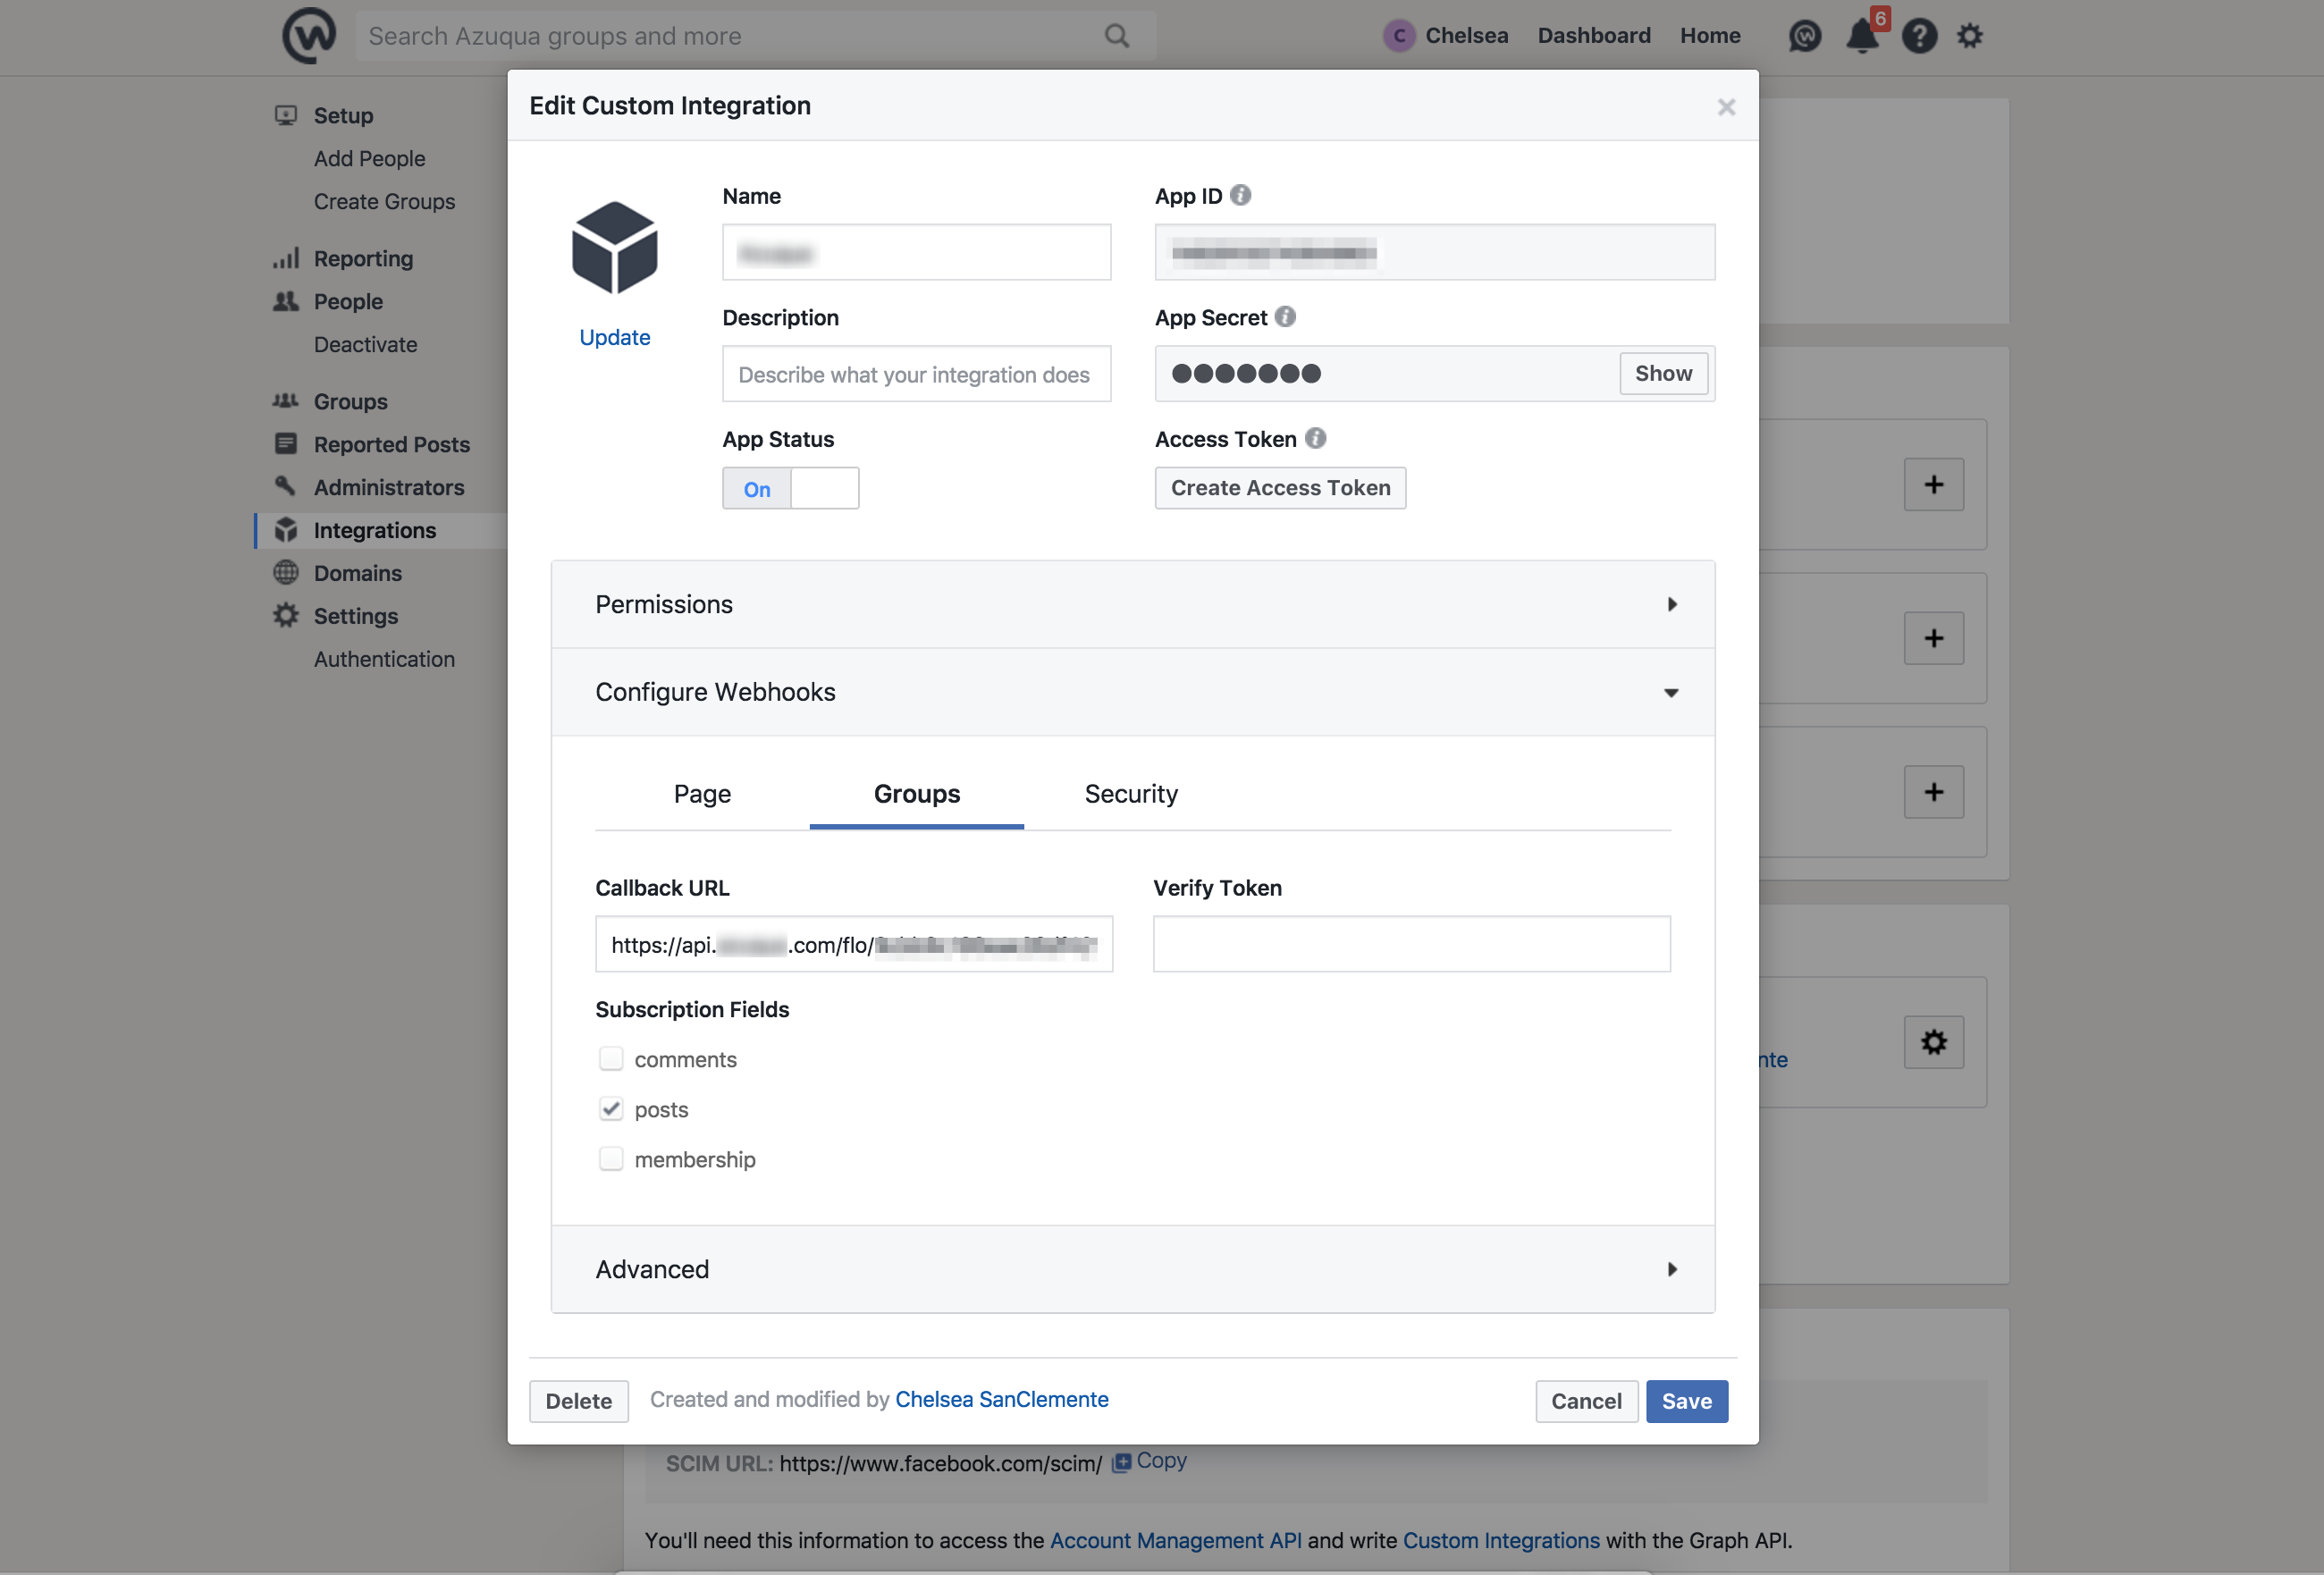
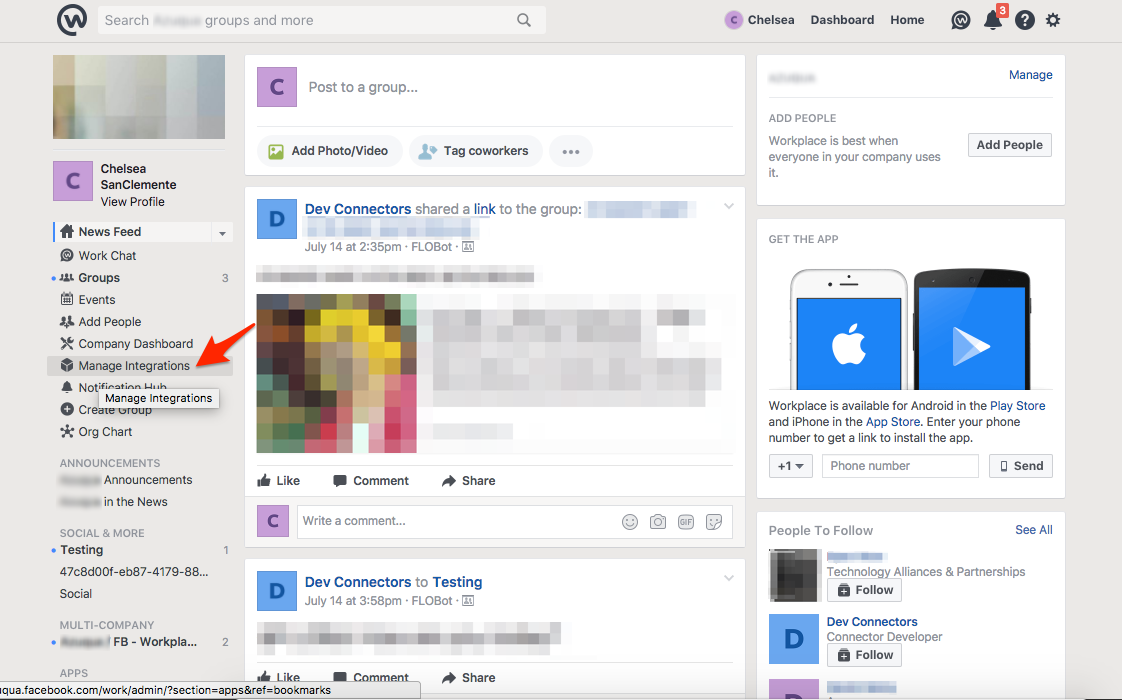
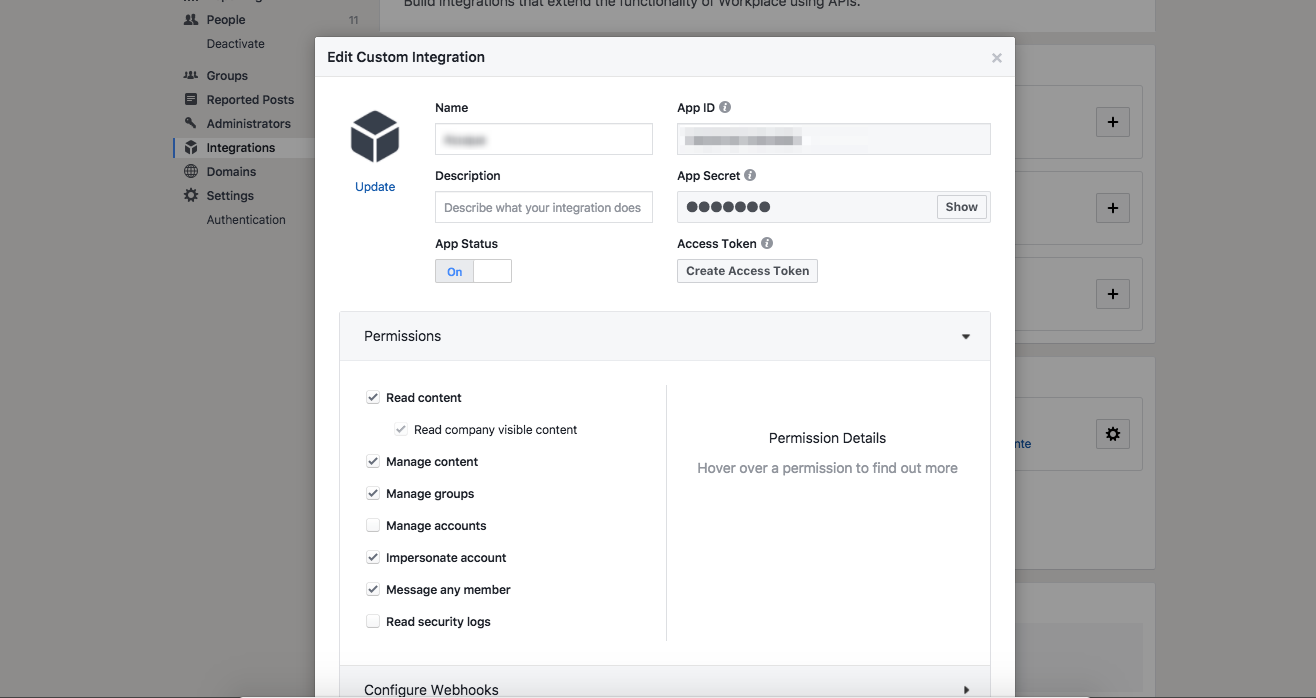
Inside Workplace by Facebook, find and open the custom integration that you created during the authentication step.
Inside the “Configure Webhooks” panel, select the “Page” tab. Paste in the webhook URL from Azuqua and select the “mention” subscription field. You do not need to provide a “Verify Token.“
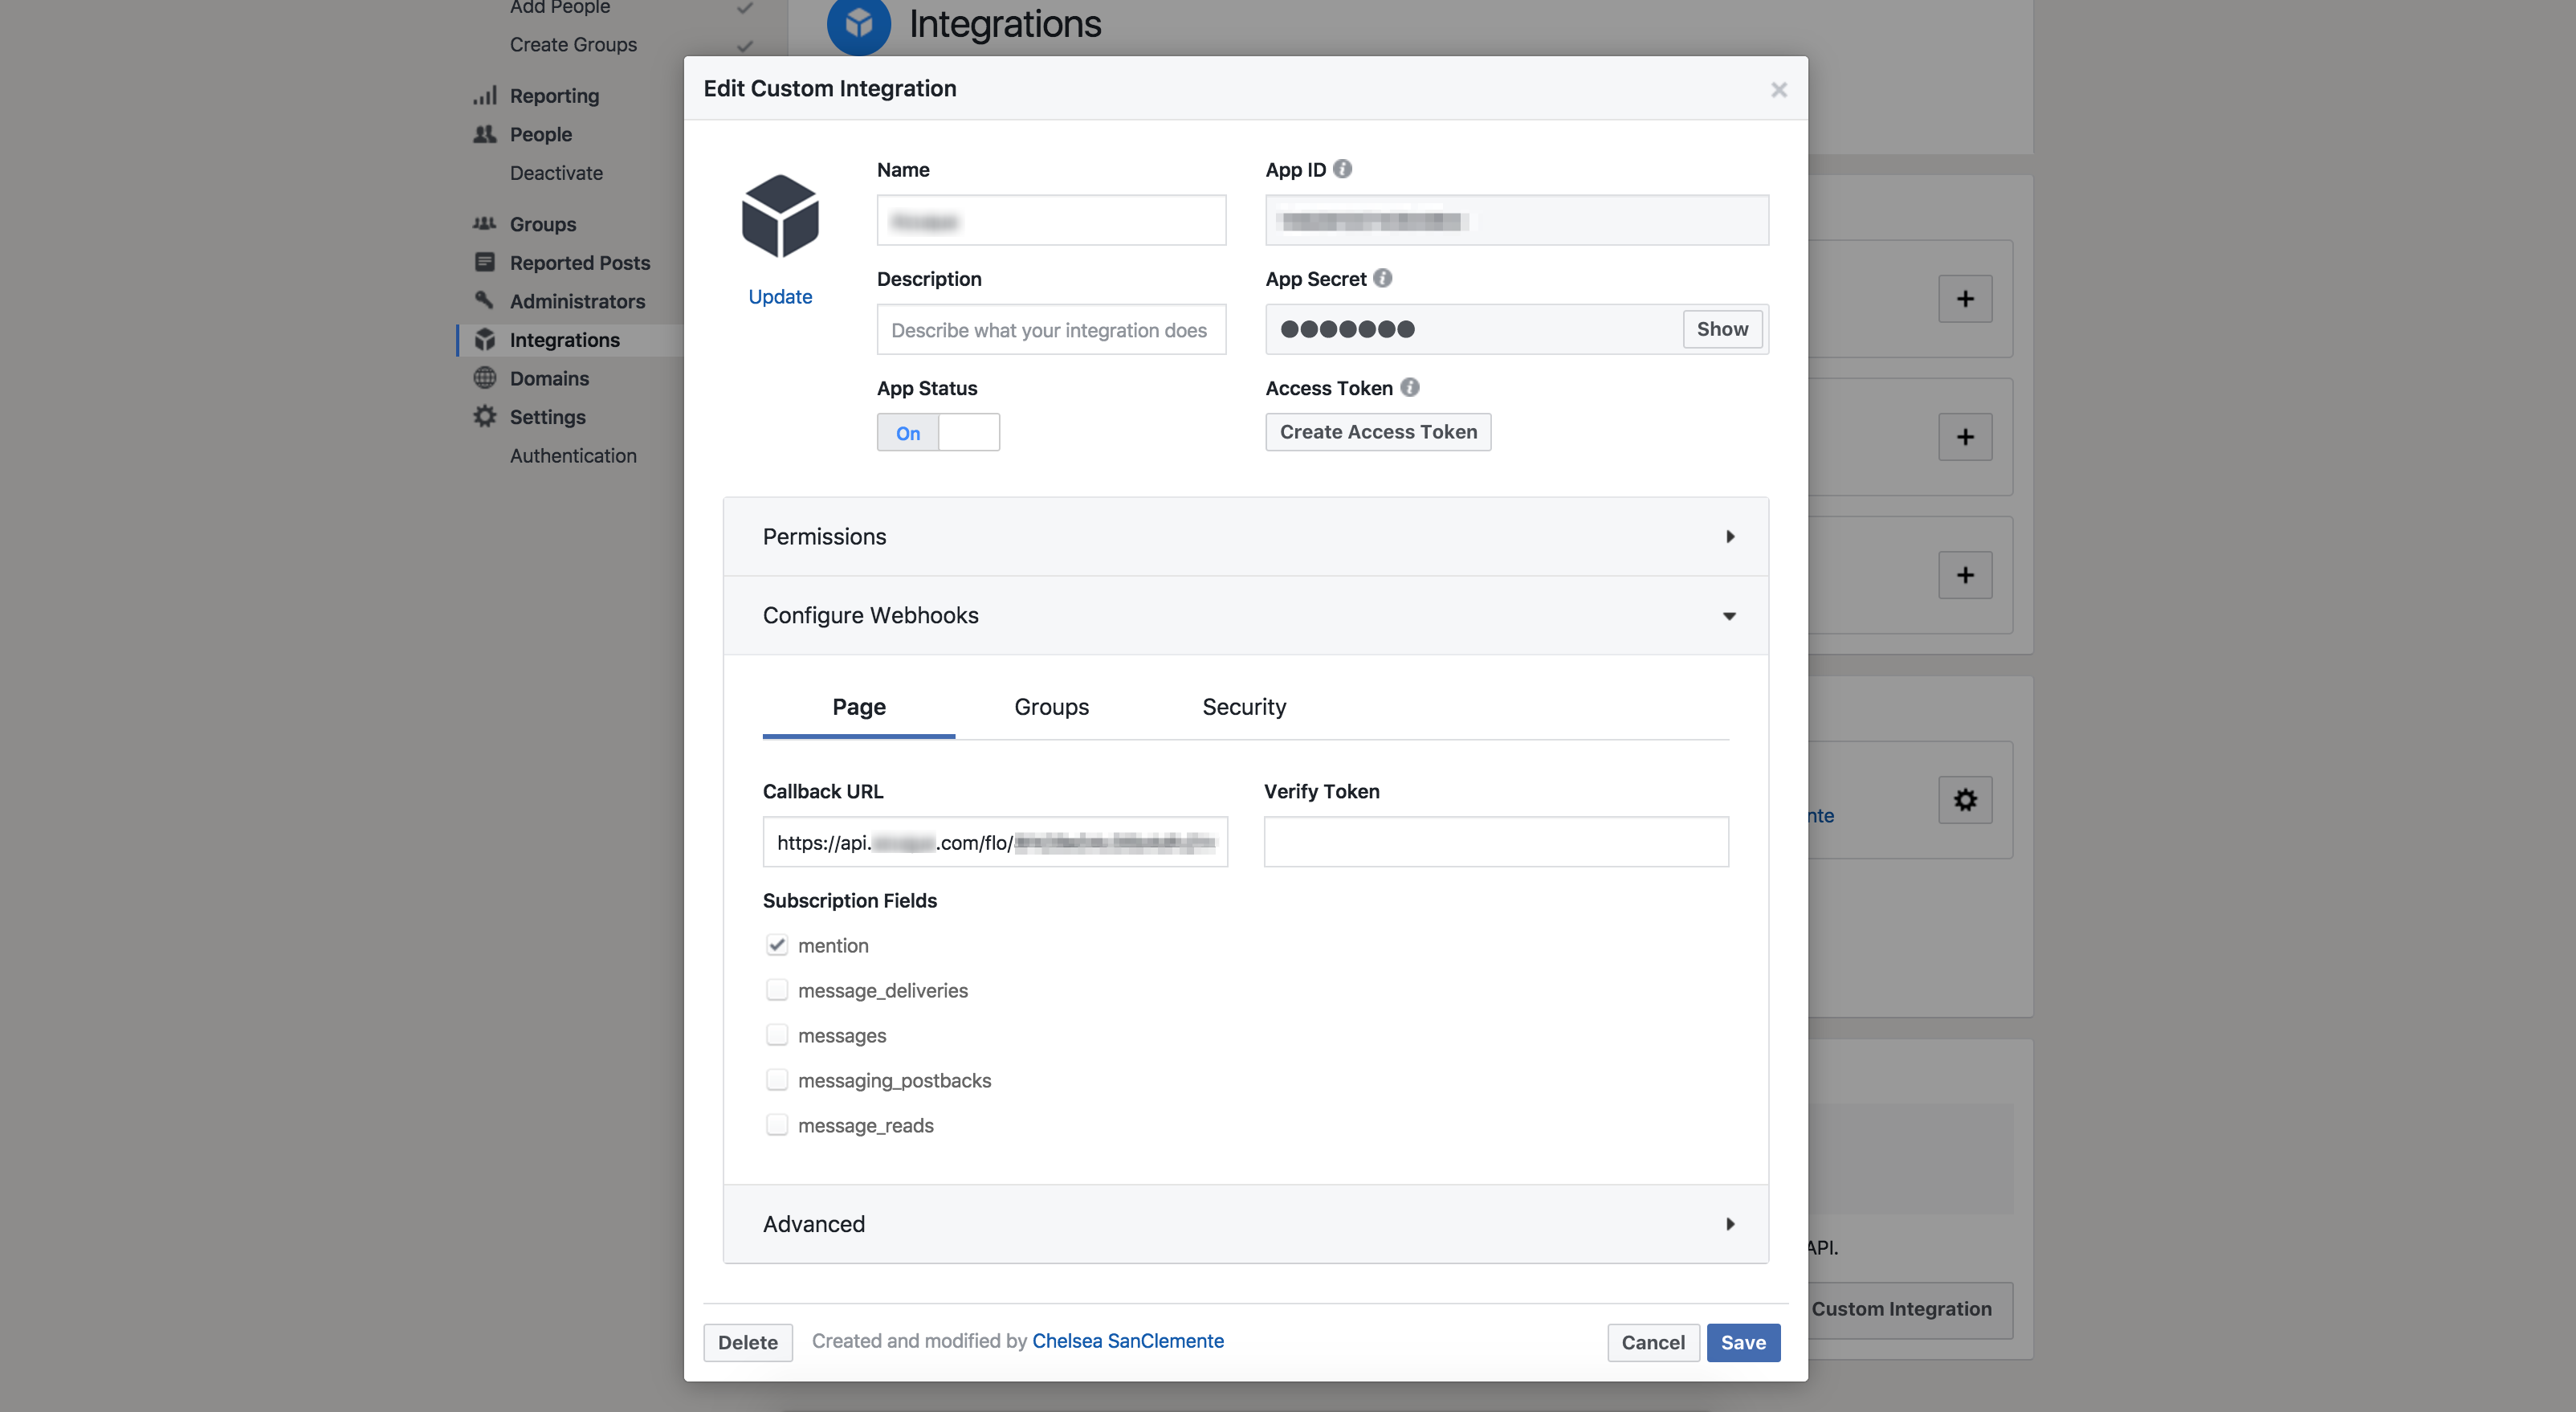
Select “Save” to save your webhook. If you receive an error, it is possible that your Flow is not turned on.
Return to Azuqua and finish building your Flow. You will see one empty execution in your Flow history. This is a test sent by Workplace when you saved your webhook to check that the URL was valid. All future executions will contain data sent to your webhook.
NOTE: Because Workplace only allows you to configure one bot webhook URL, you will only be able to have one Flow that uses either New Bot Mention or New Bot Message at any given time. After configuring New Bot Mention you cannot make a different Flow that begins with New Bot Message and vice versa. You may also not have multiple Flows that begin with New Bot Mention. Creating a new Flow that begins with New Bot Mention the will invalidate the previous URL and cause your existing Flow to break.
Fields
- Post
- Post ID (text): The ID of the post in which the bot was mentioned.
- Message Text (text): The text of the post. This will include the bot mention (e.g. “@YourBotName, say hello!”).
- From Member ID (text): The ID number of the user who created the post.
- From Member Name (text): The name of the user who created the post.
- Mentions (list of text): A list of all the mentions in the post, including the bot.
- Created At (number): The time when the post/mention was published.