This workbook is designed to accompany section 202 - Handling Dates and Times.
Pre-Requisites
For this workbook, you should have your own environment with login credentials.
If you are using a Production environment, please take care with any existing processes.
You may also elect to use 30-day free Trial Org by visiting: https://azuqua.com/sign-up
Because this is an Integration product, we will encourage you to use freely-available applications within this material. Tools such as Twitter, Slack, and others are great products and typically allow you to sign-up for free!
Exercise 202-1 - Time Zones
First example is easy … let’s calculate the time in several time zones!
- Create a new Flow
- You can choose any event - such as Child Flow
- You may also choose to delete the event for testing purposes
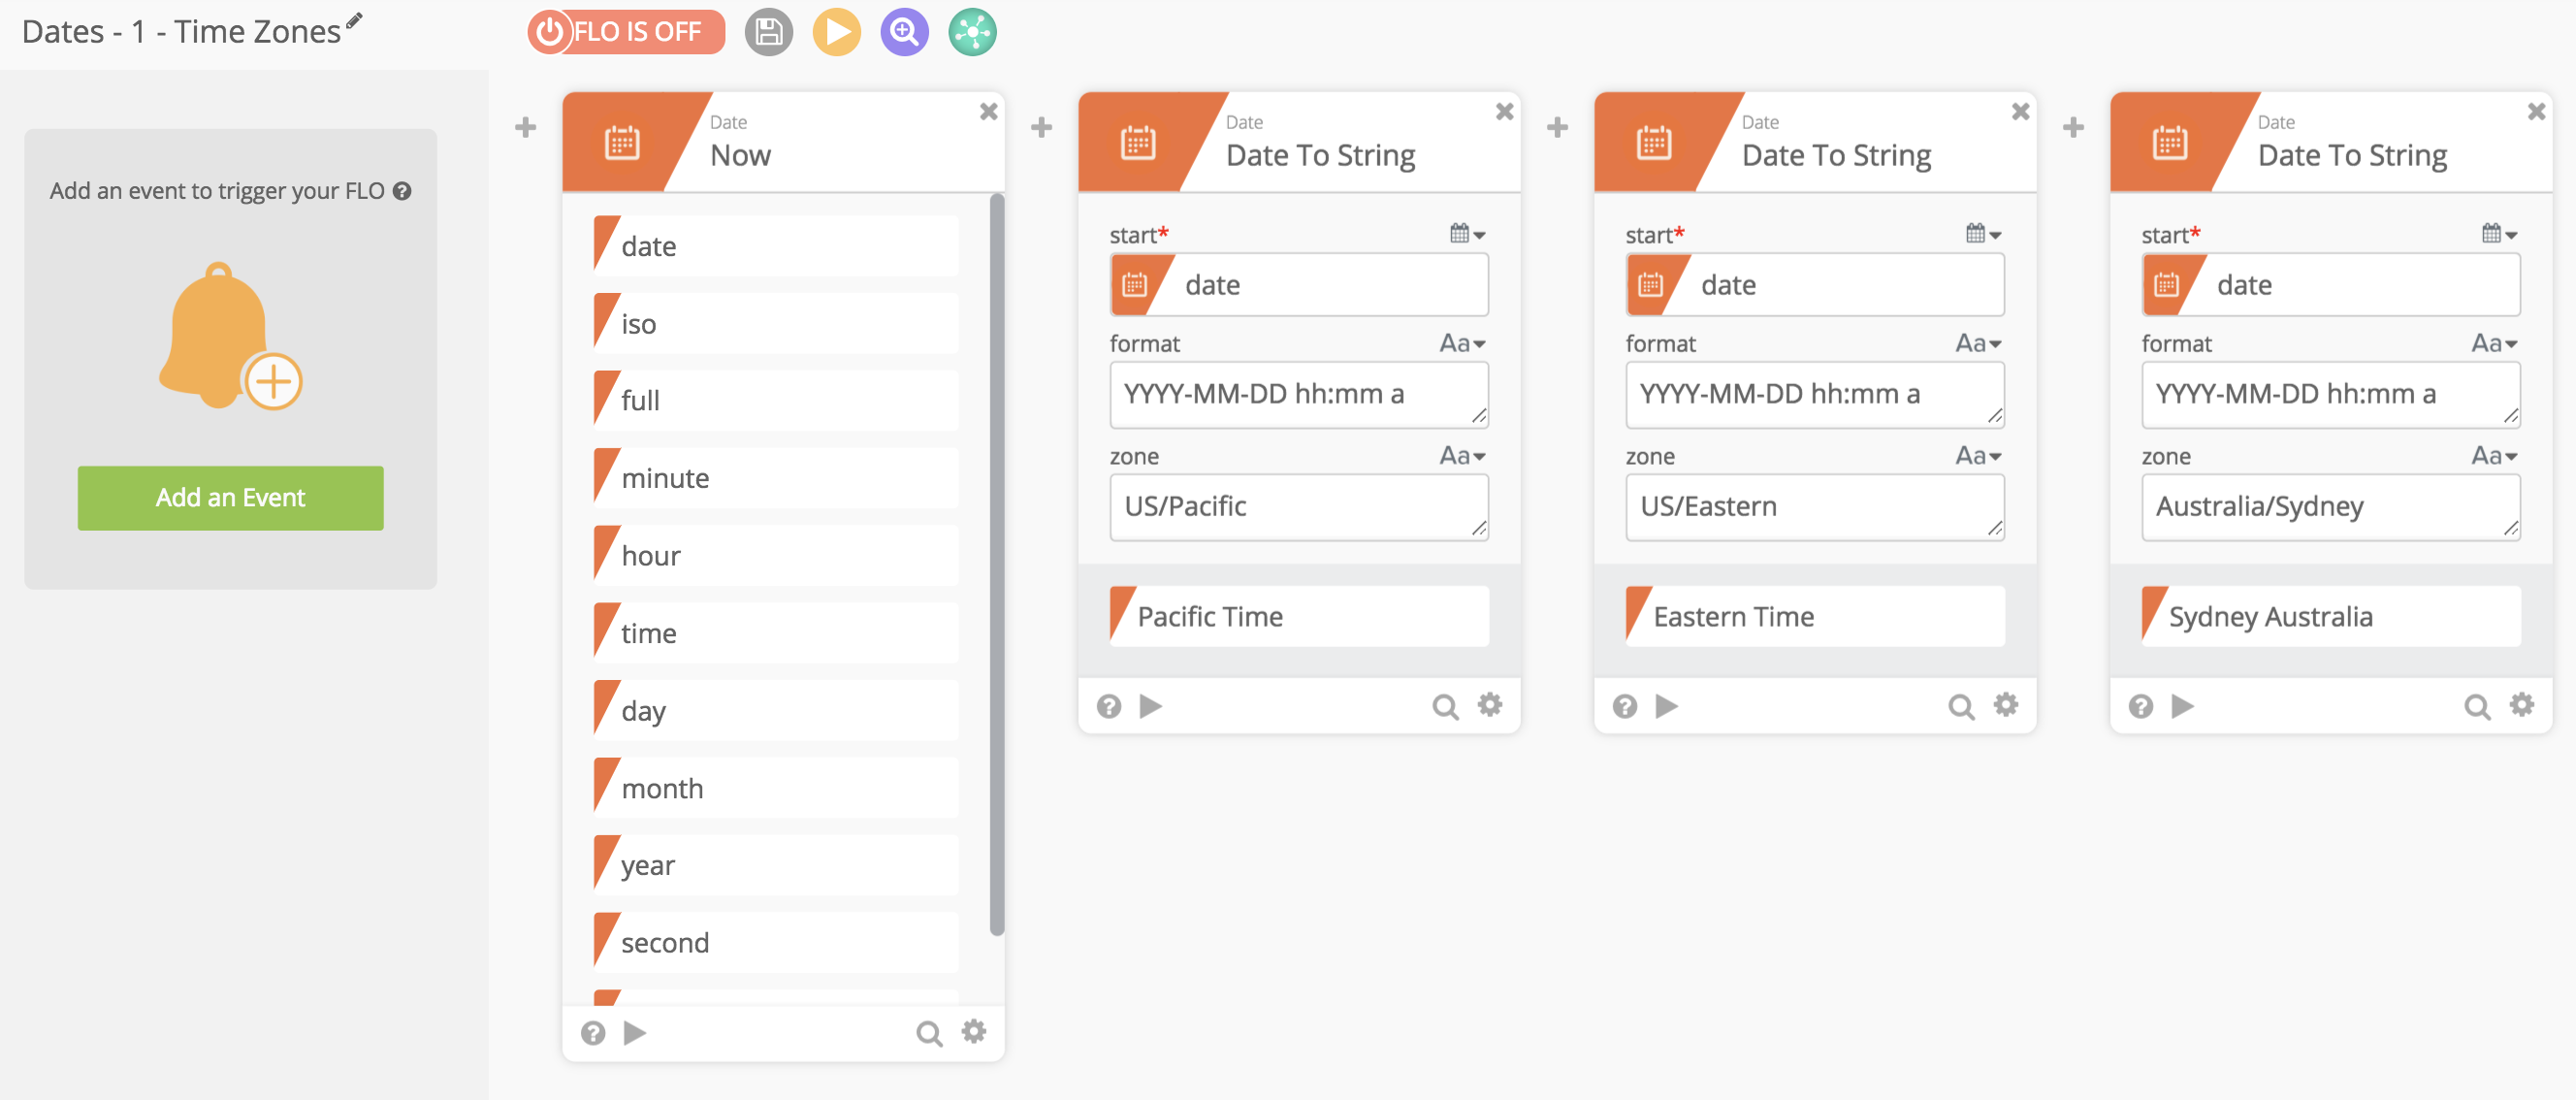
- Add a “Now” card (Date >> Now)
- Experiment with this card by testing it … check the different date/time formats that result when you click the “Test this card” button
- Click the “Help” icon to see what options are available
- Add Three (3) Date to String Cards (Date >> Date to String)
- Drag the “date” field from the Now card to the “start” of each Date to String Card
- Set the “zone” field for each card
- Card 1: US/Pacific
- Card 2: US/Eastern
- Card 3: Australia/Sydney
- Click the “Help” icon on any of these cards to check what options are available
- Remember [the full list is from Wikipedia] can also help when you’re stuck! (https://en.wikipedia.org/wiki/List_of_tz_database_time_zones)
Exercise 202-2 - Convert to Several Date/Time Formats
In this exercise, take some time to work with different date and time formats!
If your organization commonly works with different countries and different kinds of software, you know that there are a number of different date formats.
- Create a new Flow
- You can choose any event - such as Child Flow
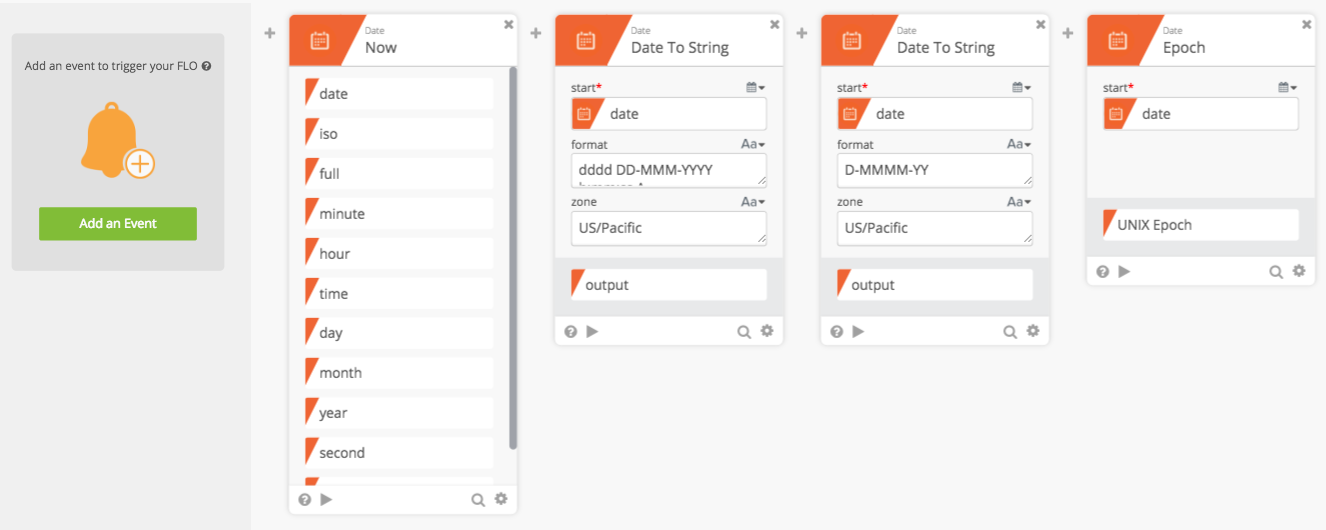
- Add a Now card
- Add two (2) Date to String cards (Date >> Date to String)
- For the first
- Drag the date field to the “start” field
- Set the format to: “dddd DD-MMM-UYYYY h:mm:ss A”
- Set the timezone to your preference (e.g. “US/Pacific”)
- For the second
- Drag the date field to the “start” field
- Set the format to: “D-MMMM-YY”
- Set the timezone to your preference (e.g. “US/Pacific”)
- Add an Epoch Card (Date >> Epoch)
- Again - drag the date from the Now card to the “start” field
Run the Flow and check the outputs from the cards!
Exercise 202-3 - Differences
In this example, you’ll learn how to perform additions/subtractions and (easily) calculate differences between dates!
- Create a new Flow
- Again, choose any event - such as Child Flow
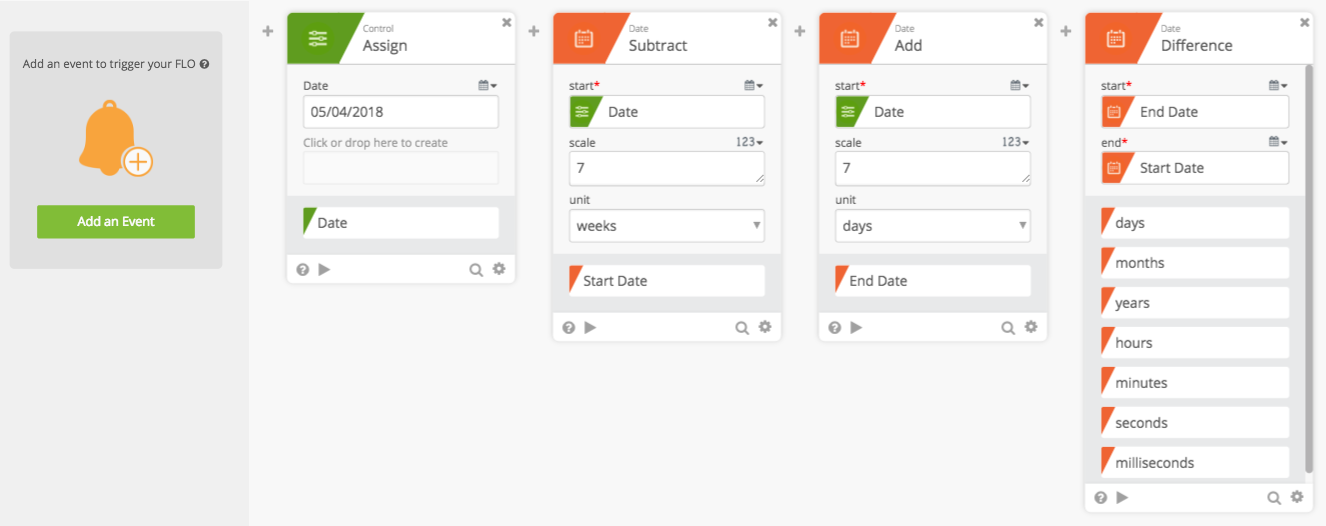
- Add the Control >> Assign card
- Change the field name to “Date”
- Set an initial date (e.g. 5/4/2018)
- Add a Date >> Subtract card
- Drag the Date from the Assign card to the “start” field
- Set “scale” to “7”
- This will subtract seven weeks and set that as the “Start Date”
- Change the name of the output to “Start Date”
- To do this, remember you can click the gear icon at the bottom of the card
- Add a Date >> Add card
- Similar to what you did with the Date >> Subtract, add seven days and set that as the “End Date”
- Set the name of the output to “End Date”
- Add a Date >> Difference card
- Set the “start” to the output of the Add card (End Date)
- Set the “end” to the output of the Subtract card (Start Date)
Now try running the Flow and test what you get as output!