Fire monitor when an employee’s time off is updated in Workday
Workday Report-as-a-Service (RaaS) is a feature that exposes reports as web services. Azuqua uses this web service to integrate data from Workday to other applications. In order to use the Employee Time Off Updated event, a custom report configured as Advanced type needs to be built first.
To use this card, you must complete the following steps:
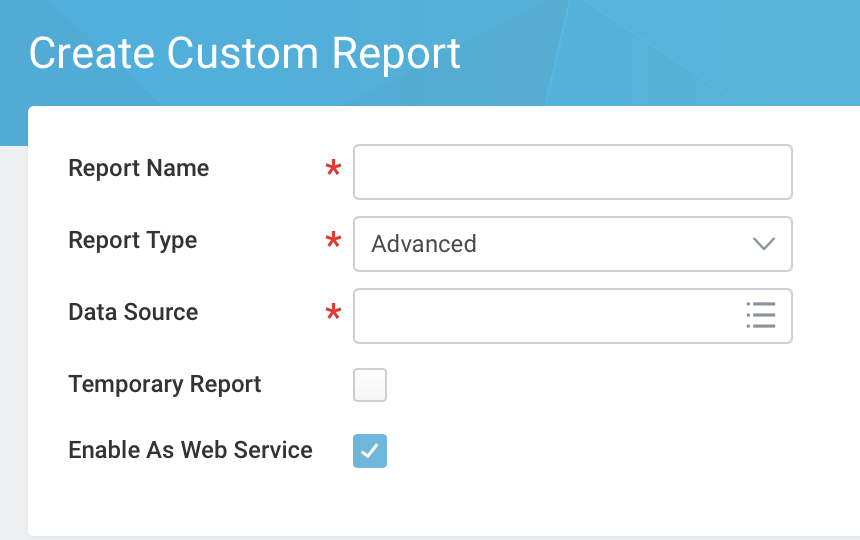
- Create advanced type custom report with Web Service enabled. Search for “create custom report” in Workday search bar, open the Create Custom Report task, select Advanced for Report Type, select “Enable As Web Service”, also fill in required fields.
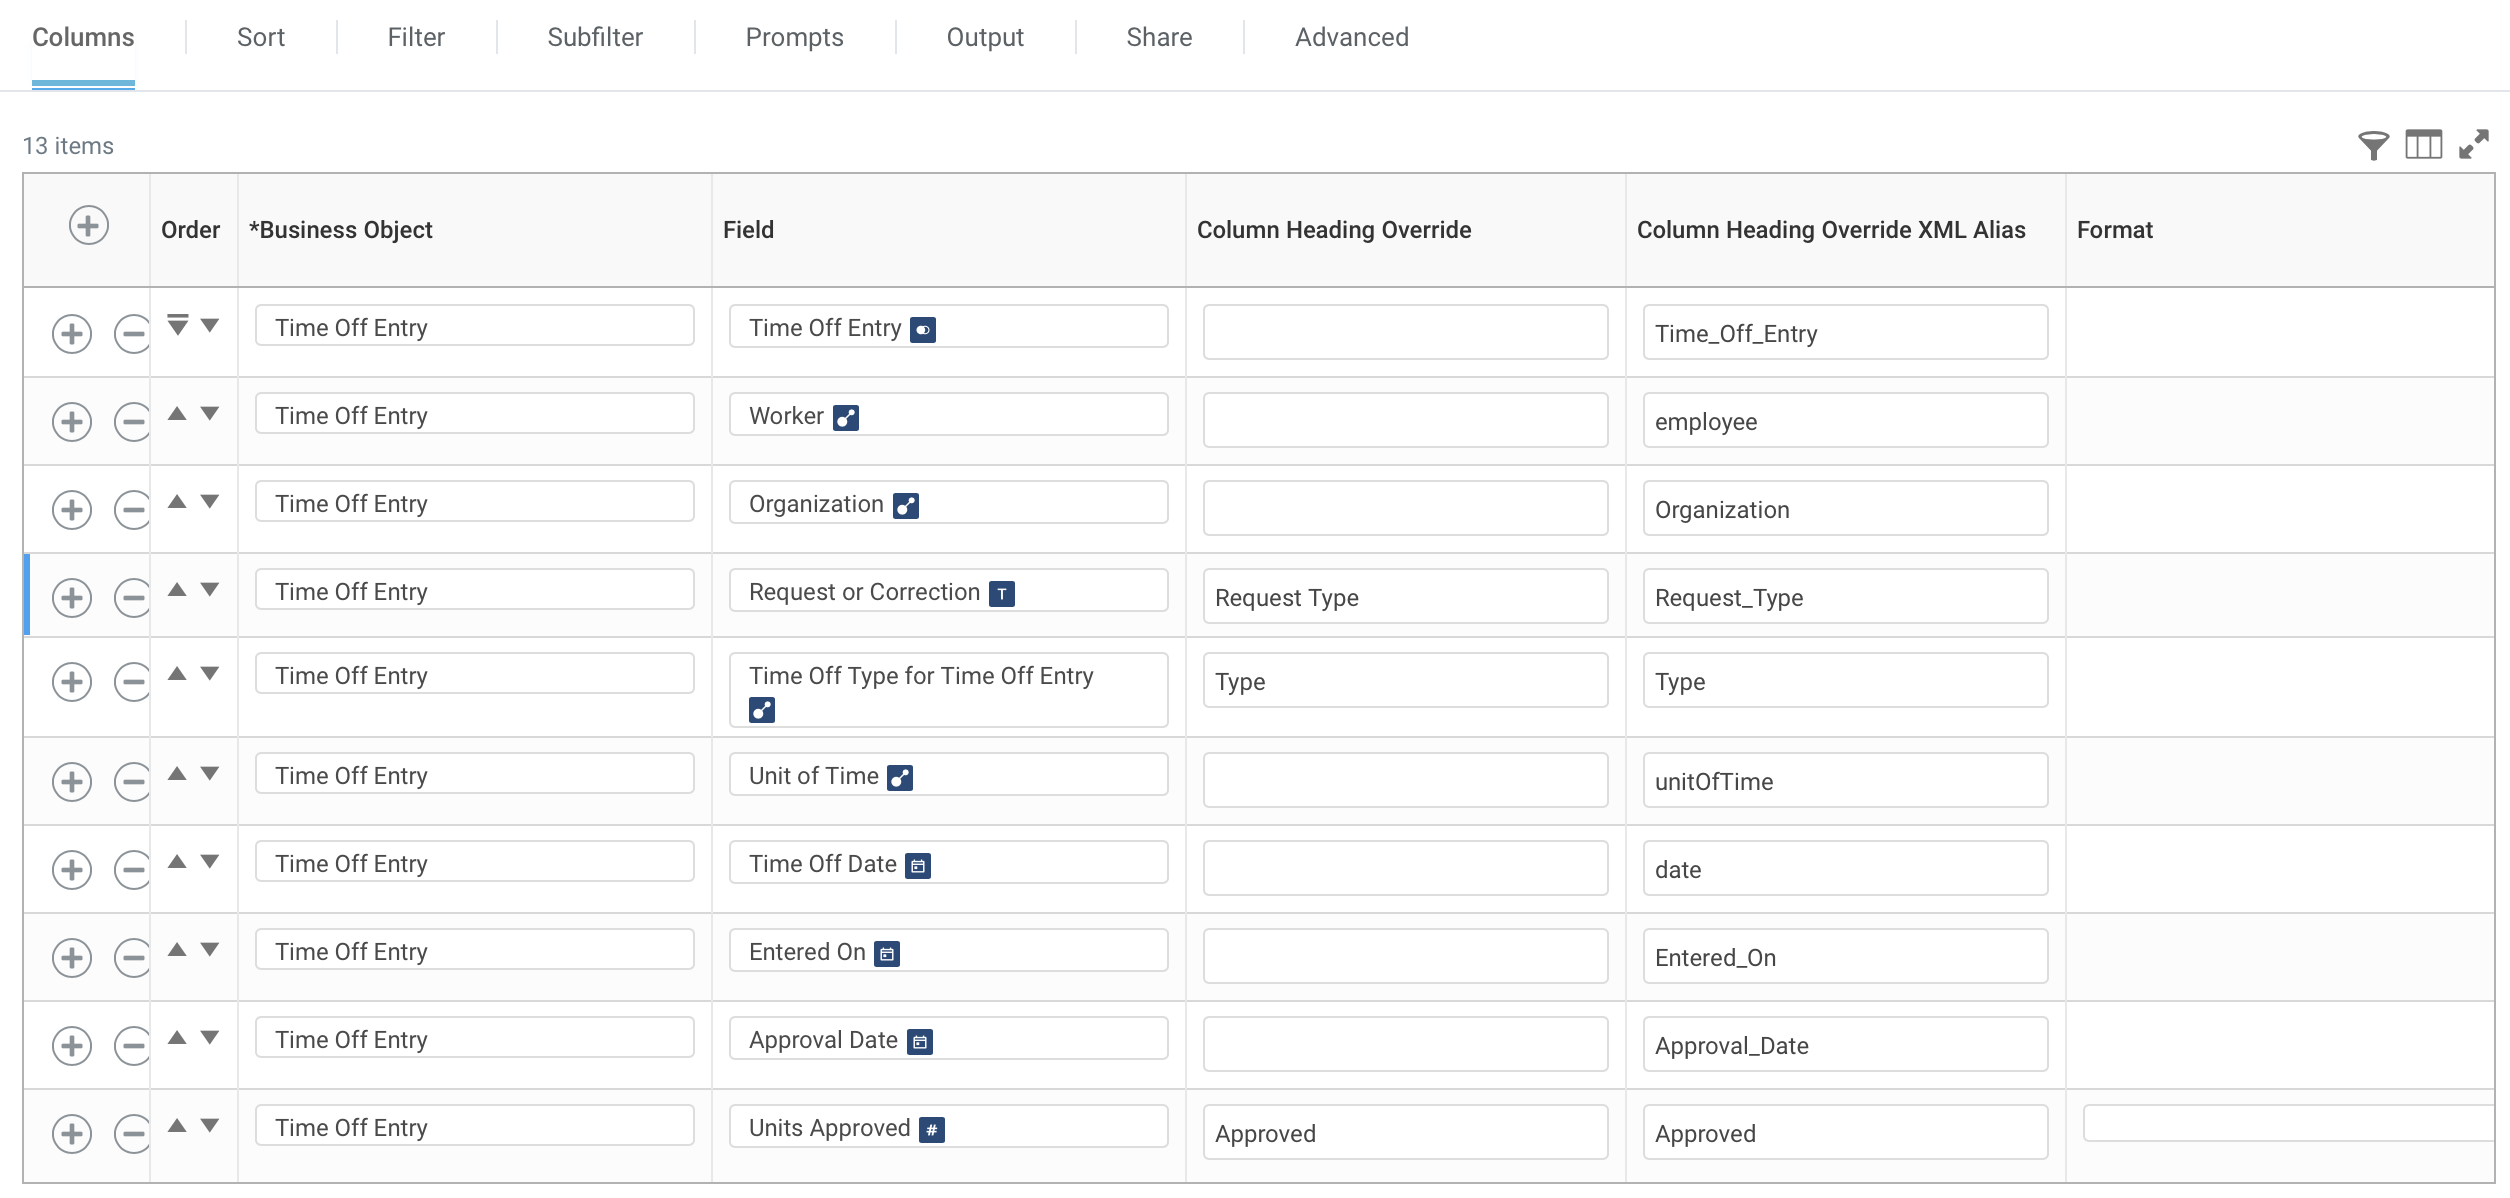
- Add the report columns that will be used in the integration between Workday and other applications. Note the Column Heading Override XML Alias needs to be the same as in the following image.

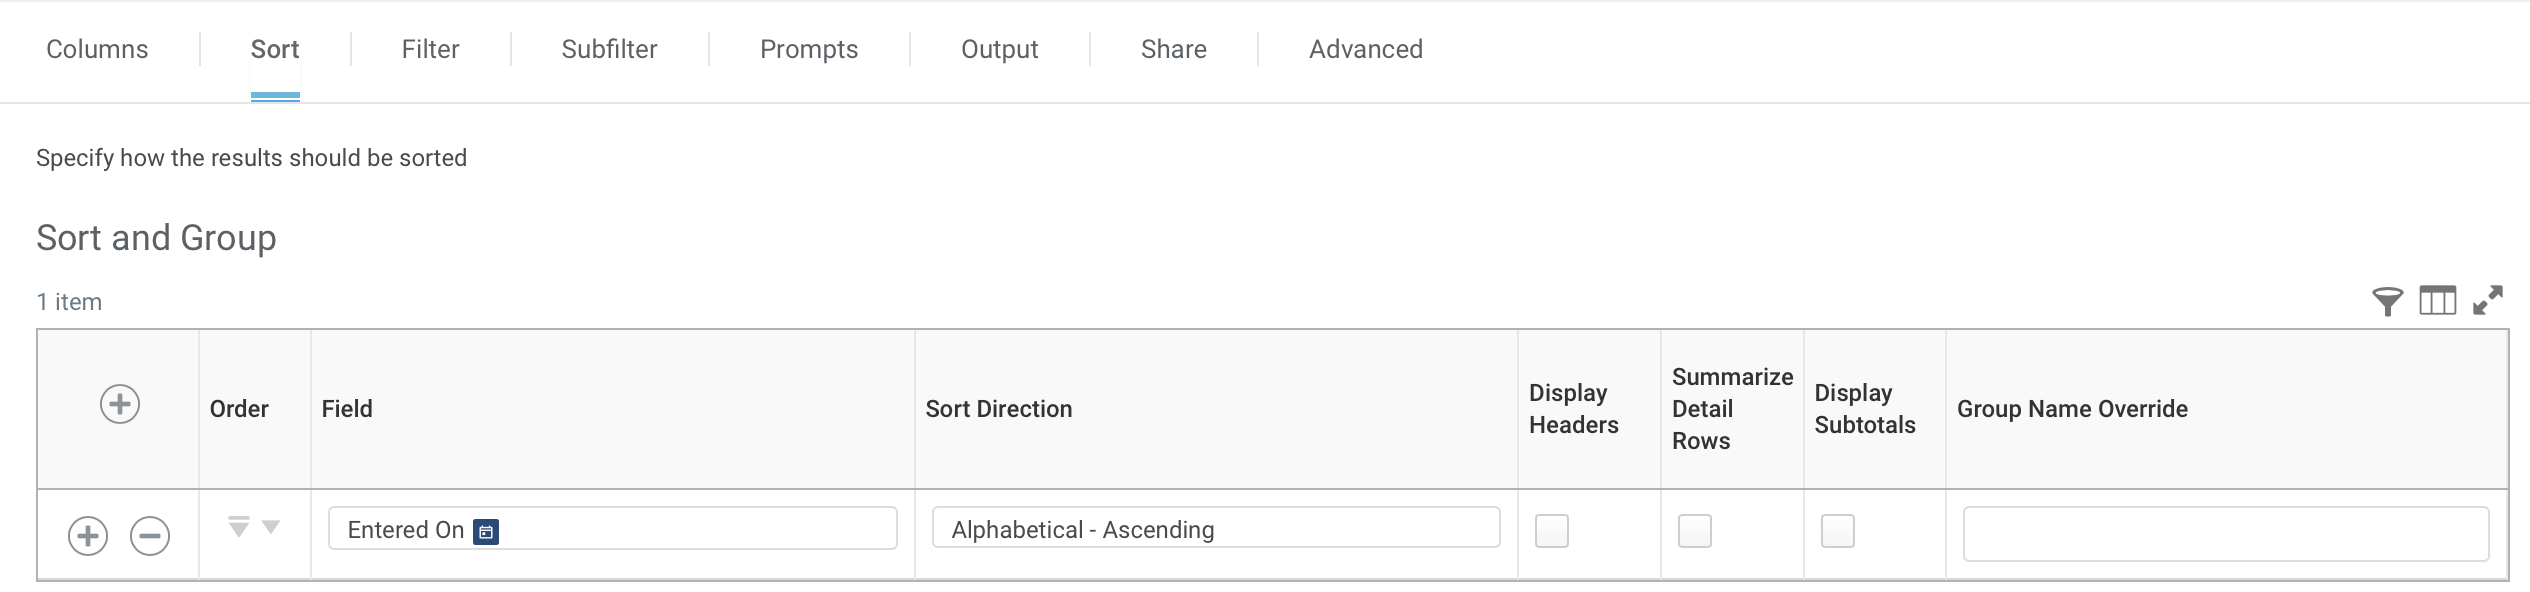
- Add sorting for the custom report that ascends according to Entered On date.
- Apply filter/logic to compare prompt values against report column values. Only records with Entered On date greater than or equal to the provided value will be included in the report. This helps us to get updated time off records from last checked date.

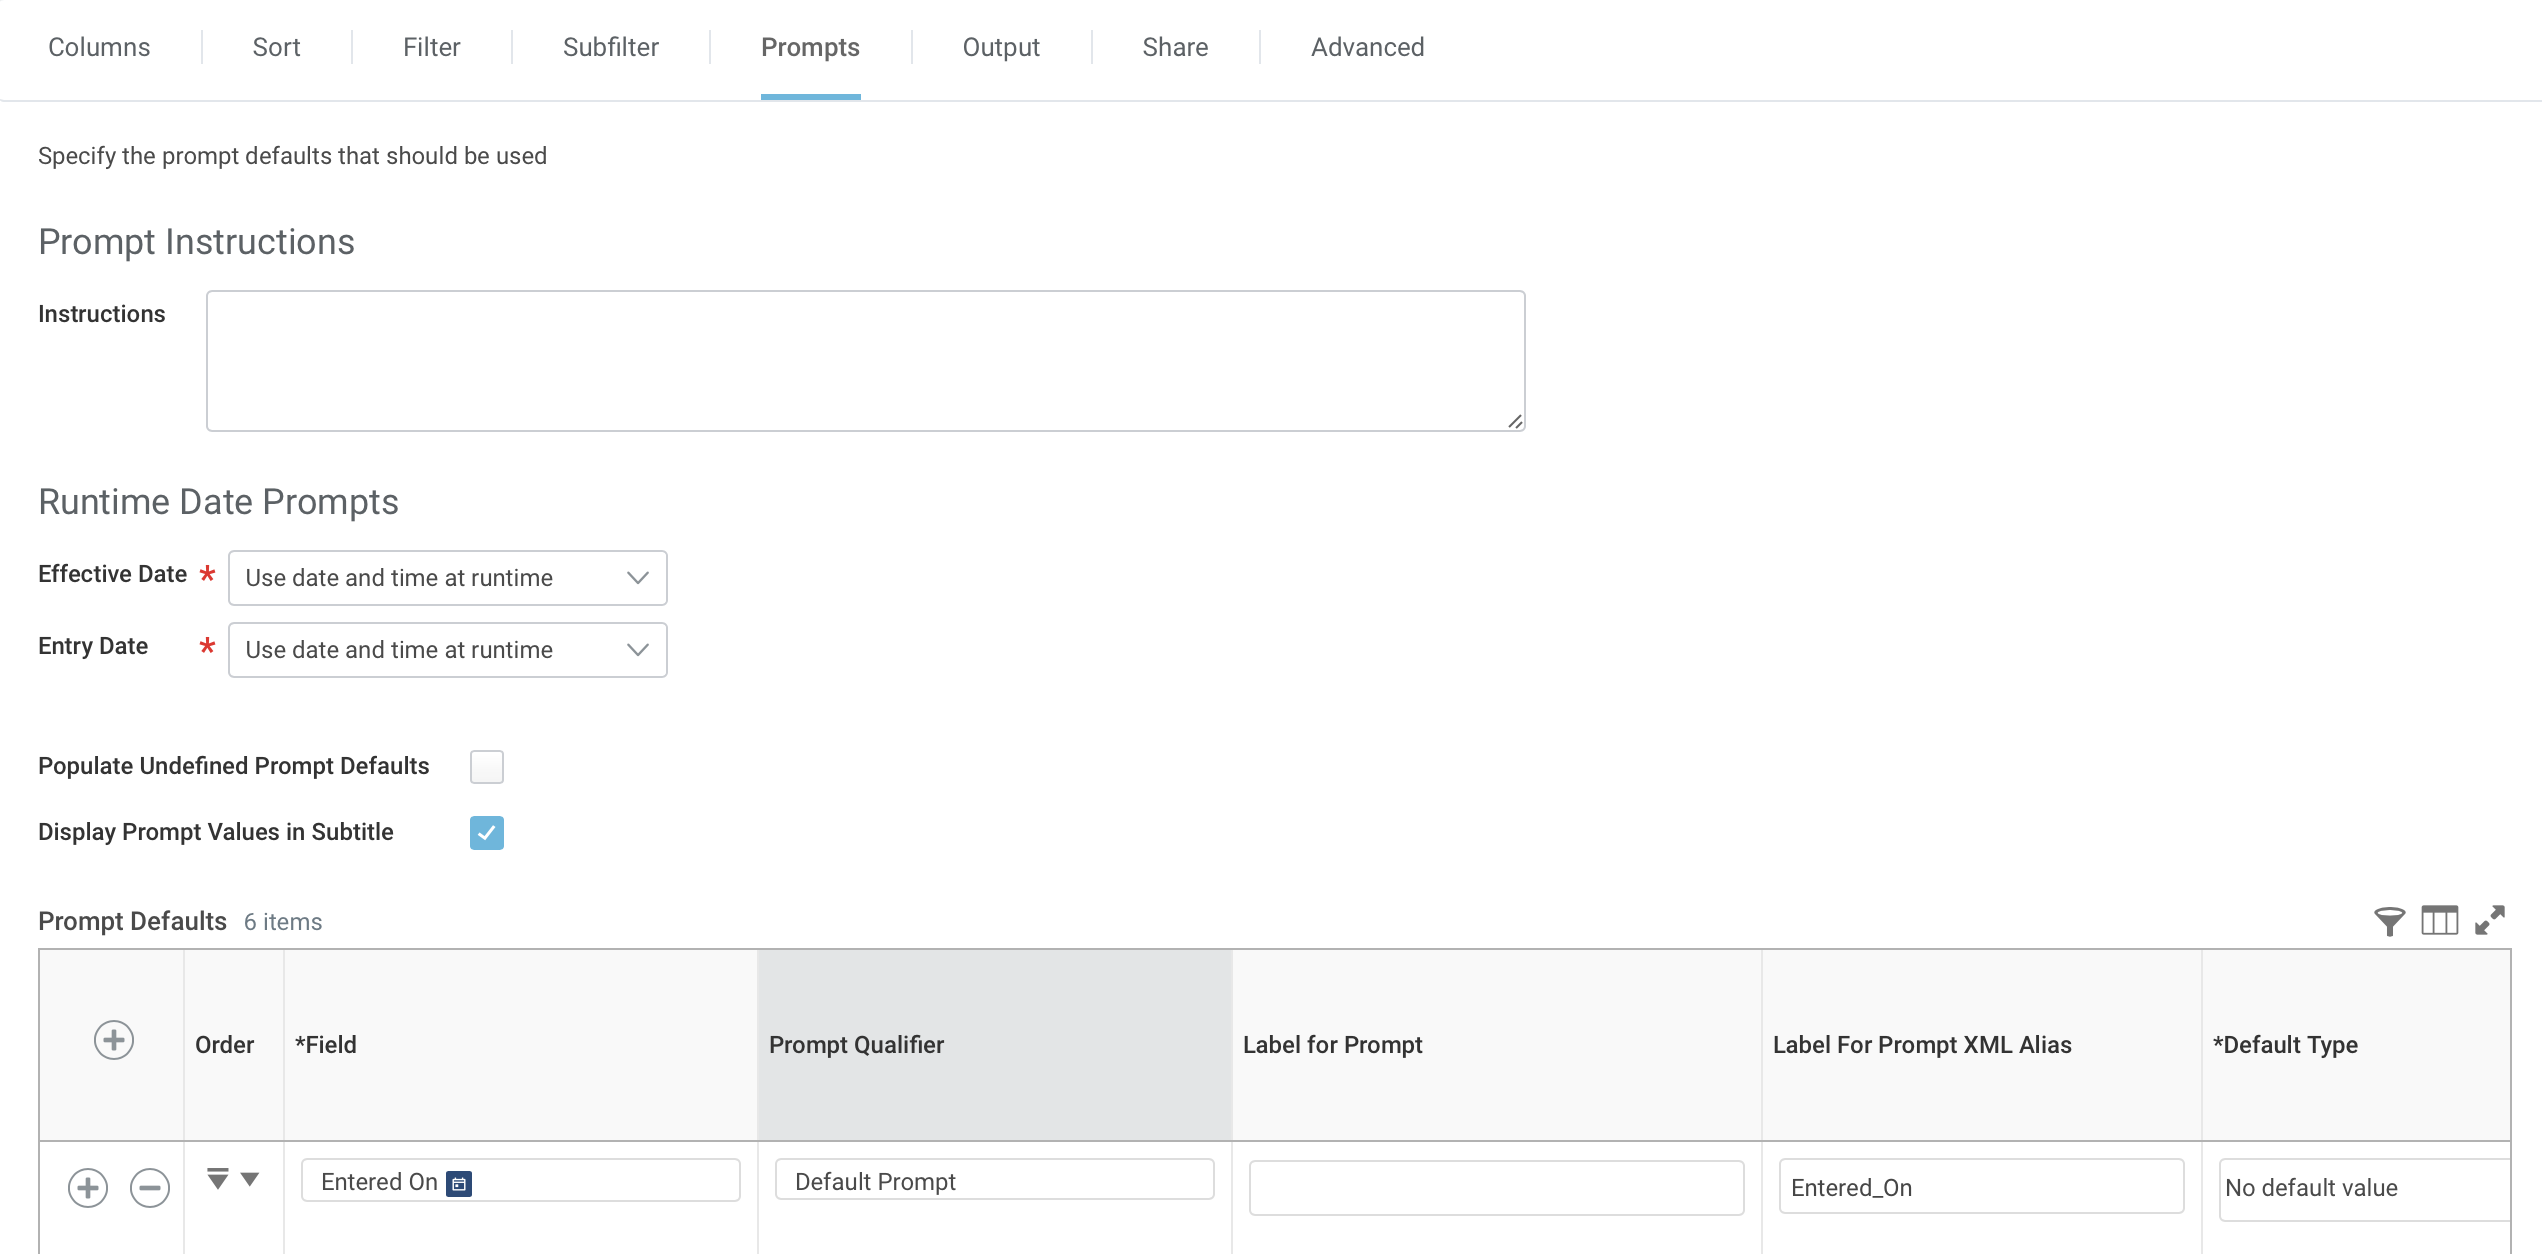
- Add the default prompt that is required for the custom report (Entered On).
- After setting up a successful connection with Workday in Designer, add the monitor Employee Time Off Updated. Note: the time stamps returned from the web service is in the format of “YYYY-MM-DD” without time. In order to minimize the duplicate records, the schedule needs to be configured as Check every Day, or Week, or Month, and it’s better to configure the check time to be at night (e.g. 1AM). Also after setting up the Flow, please manually pull it once. Or records will not return for the first scheduled time.
Parameters
- Report Owner Username: the user who created the custom report
- Report Name: the name of the custom report
- Time Zone (e.g. US/Montain): the timezone of the user. E.g. US/Montain or US/Pacific (see full list on wikipedia https://en.wikipedia.org/wiki/List_of_tz_database_time_zones)
Output Data
- Output
- Time Off Entry: a summary of the time off record
- Worker: the name of the employee
- Organization: the organization the employee belongs to
- Request or Correction: Time Off Request or Time Off Correction
- Time Off Type: the type of the time off (e.g. Floating Holiday, Jury Duty)
- Unit of Time: the unit of the time requested (e.g.Hours)
- Time Off Date: the requested time off date
- Entered On: the date the employee submitted the request
- Approval Date: the date the request got approved
- Units Approved: the number of units time got approved
- Units Pending: the number of units time pending
- Units Denied: the number of units time got denied