Writing Unit Tests in Connector Builder
At the minimum, we will want to write a single unit test for the Custom API Action. It will be important to test at least the GET, POST, and DELETE methods in the test. In general, we will create a record with POST, read it with GET, then DELETE the record at the end. Additionally, it can be beneficial to write a unitest for the _authping function.
Building Tests in Designer
It is highly important to verify that the action will work as expected in designer. It is possible that the logic looks correct in the connector builder tool, but it some items cannot be tested in the builder alone. A common example that can’t be tested is verifying that all parameters, inputs, and outputs all render as expected in the UI.
In general, we will want tests in designer to reflect typical user API usage. For the Custom API Action, we will want to build a Flow to test at a minimum GET, POST, and DELETE. This will ensure that we test for the range of available parameters, and will generate all permutations of the I/O schema.
Please include these test Flows when submitting work for approval. When a test connector has been deployed, it will have a ‘(Test)’ tag next to the name. Make sure you choose the Test version.
Input/Output with Custom API Action card
When using Custom API Action cards in designer, users will want to manipulate and format the data entering and leaving the card.
In the connector builder environment we would normally use input from the custom api action with a input.Request.INPUT_FIELD reference. For checking the output of the request you would normally use CONTROL_SPAWN_ID.Response.OUPUT_FIELD
INPUT_FIELD and OUTPUT_FIELD can equal Body, Status Code, or Headers.
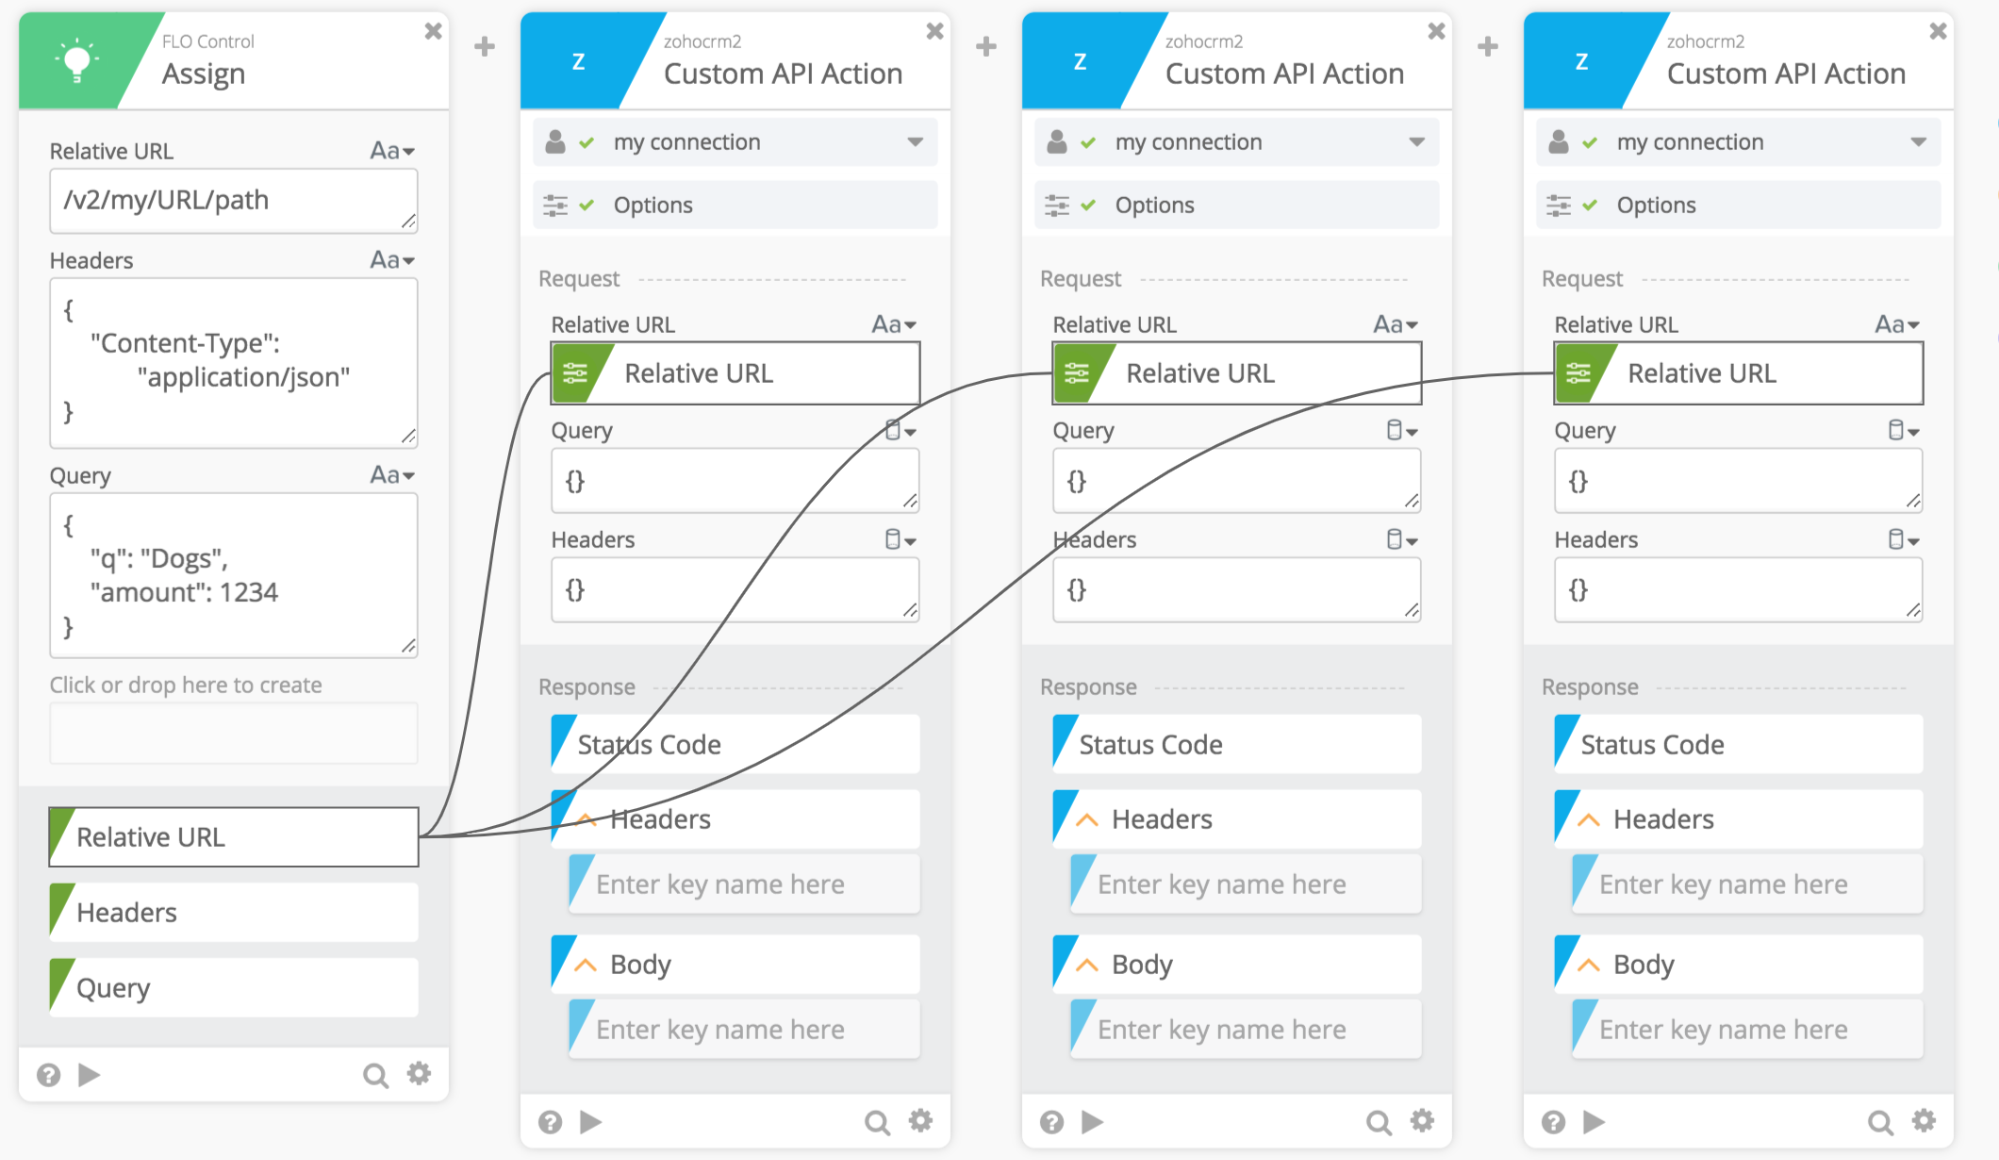
A user instead can format input to match what a Custom API Action requires such as headers, query params, and the body object using cards. Below is a high level view of a common Custom API Action card interacting with other cards:
 Below are common card patterns that will appear when users input data into the card:
* Flow Control ⇨ Assign
* Text ⇨ Compose
* JSON ⇨ Parse
Below are common card patterns that will appear when users input data into the card:
* Flow Control ⇨ Assign
* Text ⇨ Compose
* JSON ⇨ Parse
For simple input, an Flow Control ⇨ Assign card can be used to keep track of the values you want to enter into a card. The image below shows how this would look in designer:
 This pattern will save you time from having to rewrite a lot of the values going into the cards. Note that custom api action cards take in JSON objects as inputs.
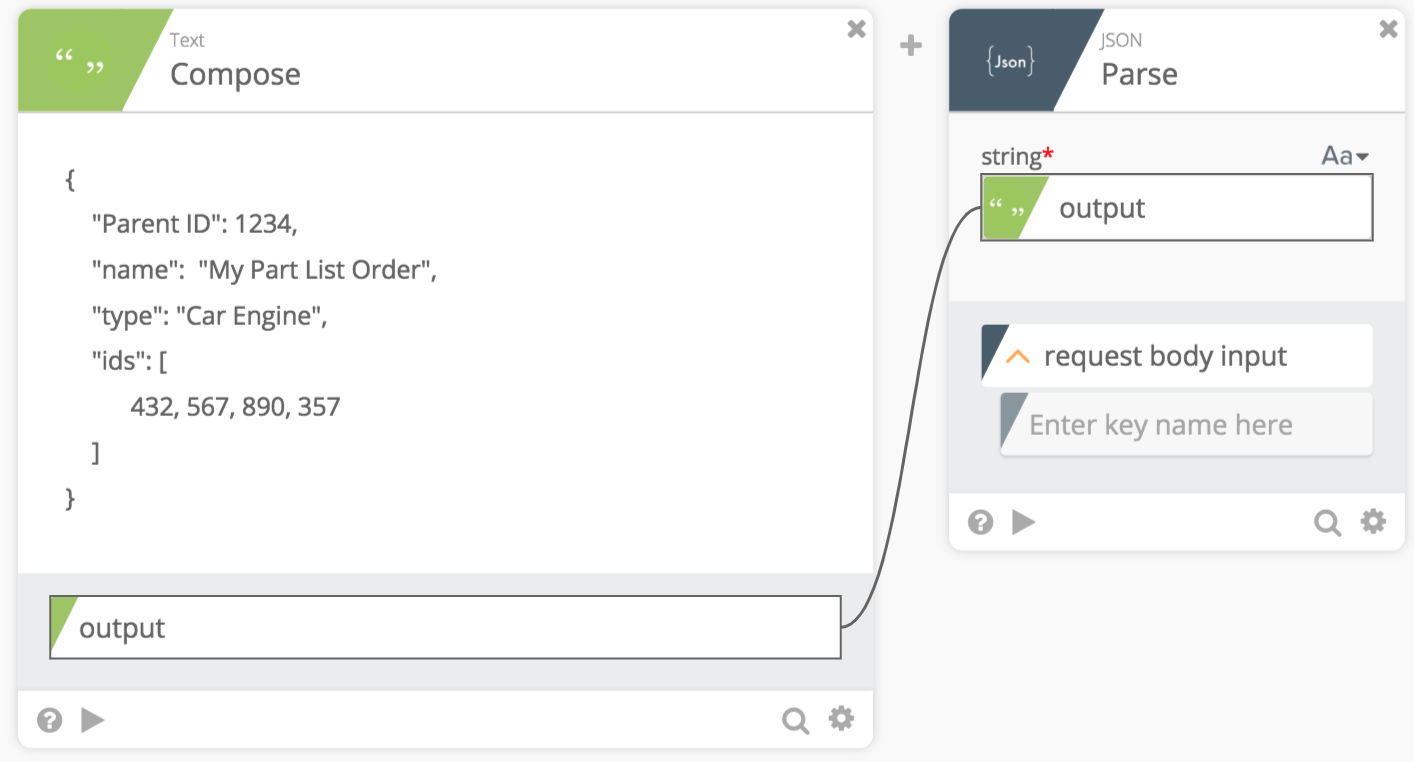
When ever one of the inputs requires a very complicated object as input it is easier to structure the input using the Text ⇨ Compose & JSON ⇨ Parse cards:
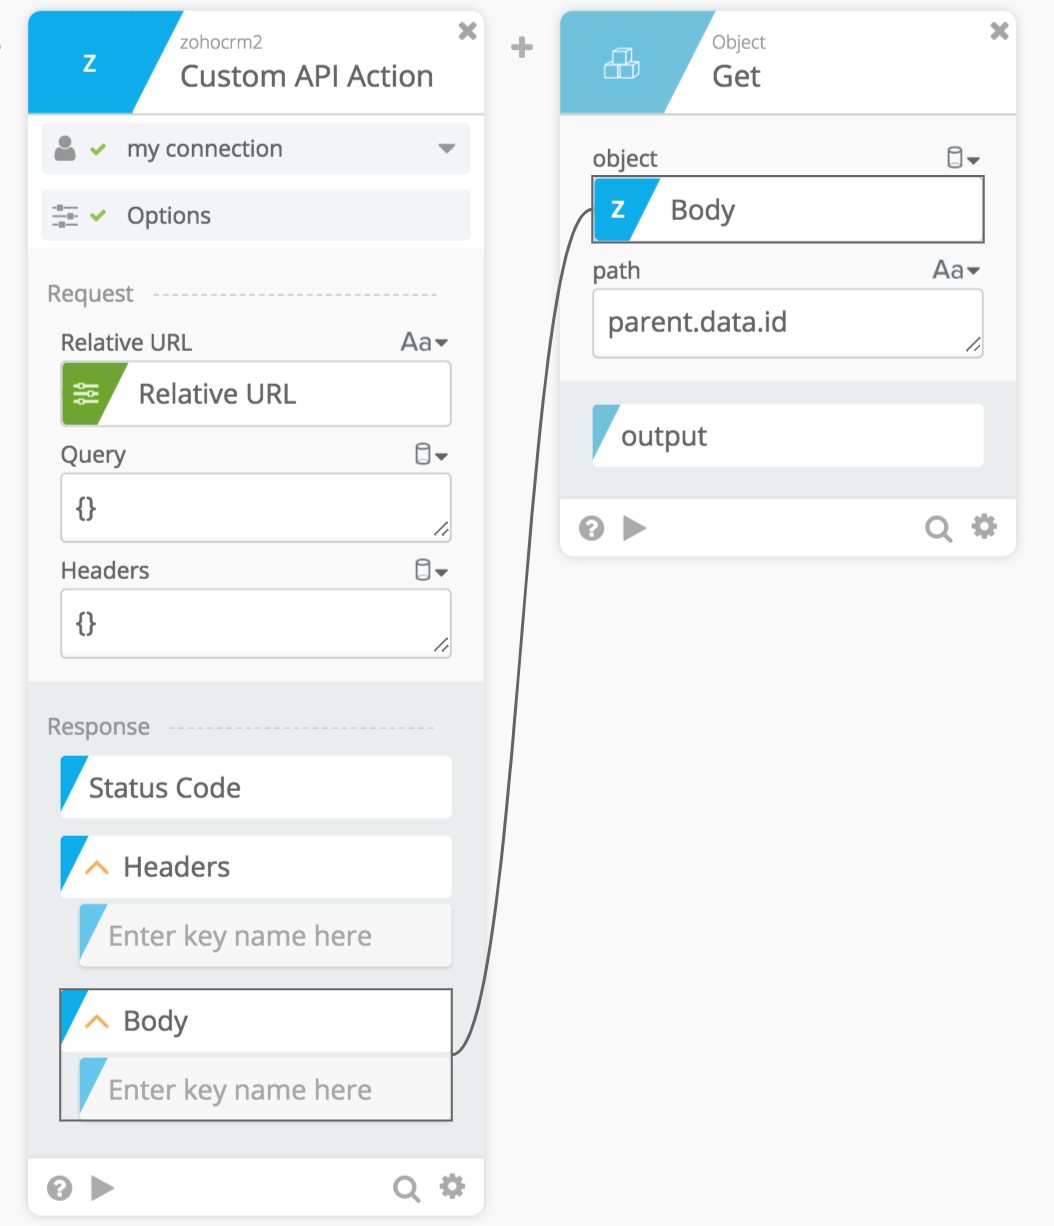
The following cards will be handy for manipulating output: Object ⇨ Get List ⇨ Map
Single Object use case
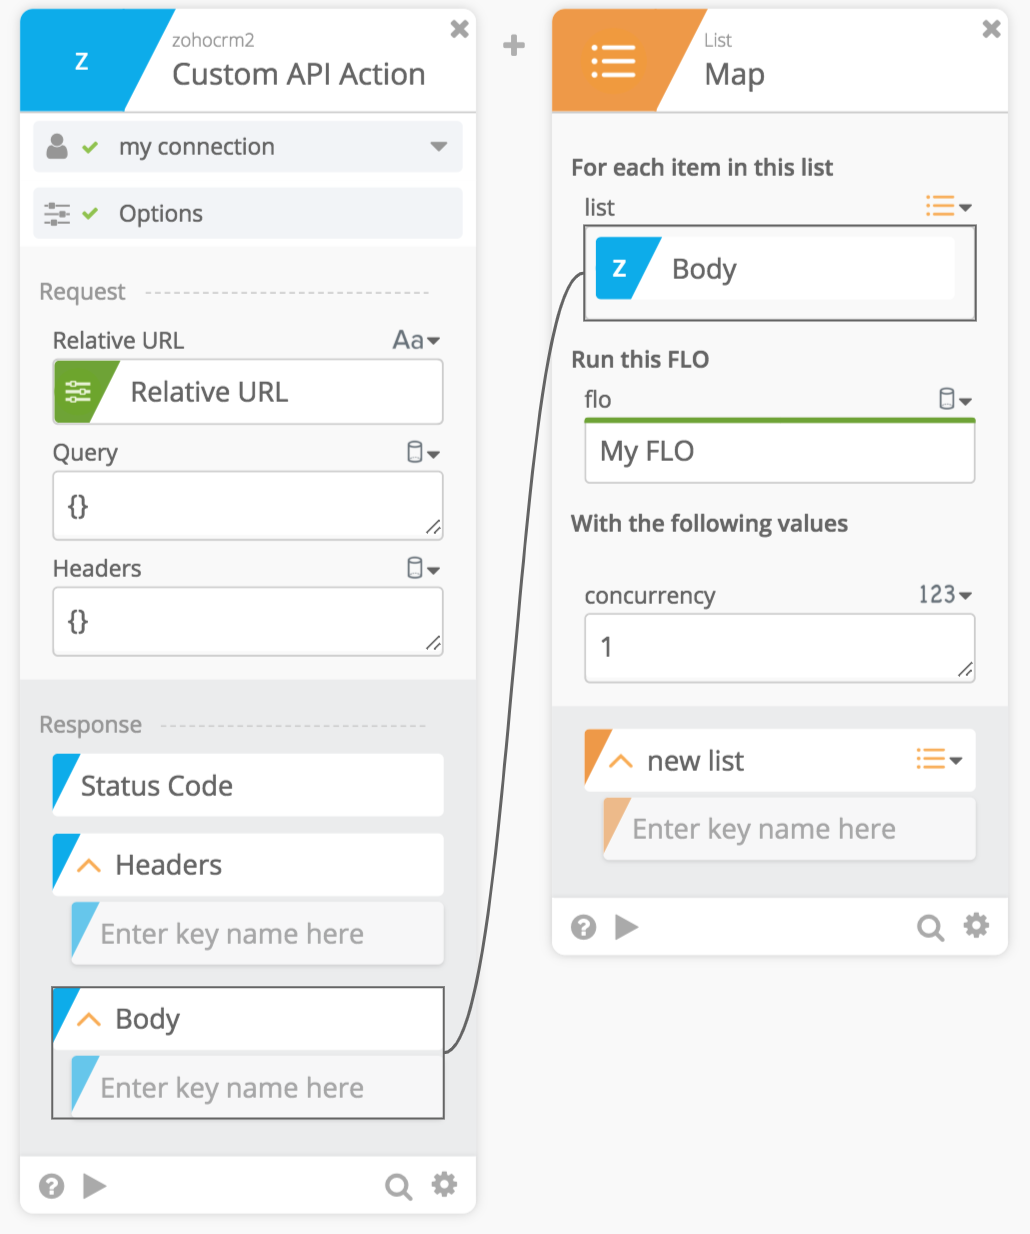
List of Objects use case
