A Custom API Action is a card that will allow users of the platform to request API services from their favorite applications without having to worry about authentication and connection lifetime. They can also create complex queries without having to wait for the creation of an Action card.
Requirements
When writing a custom api action card there are a few important requirements you should be aware of: * “name” & “description” property formatting * Implement GET, POST, DELETE, PUT, PATCH * User Fields - Relative URL * Metadata Function - getHttpInputs * Making the API request * Unit Tests
“name” & “description” property formatting:
As a best practice, it is recommended that all custom api action cards are created with certain naming conventions:
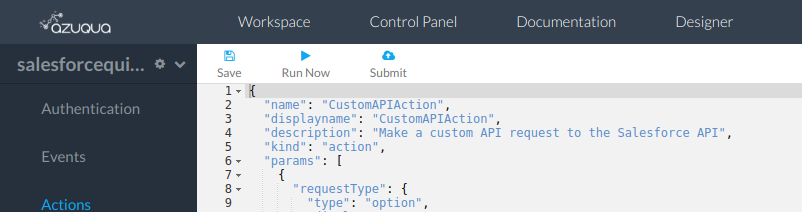
* When creating the card in the development environment make sure to set the property. “name”: “CustomAPIAction”
* The display name in designer should also be formatted to be the following: “displayname”: “Custom API Action”
* Make sure that after the Action is created in the development environment it follows the convention. “description”: “Make a custom API request to the YOUR_PRODUCTION_CONNECTOR_NAME API”
The image below shows these properties implemented for the Salesforce connector:

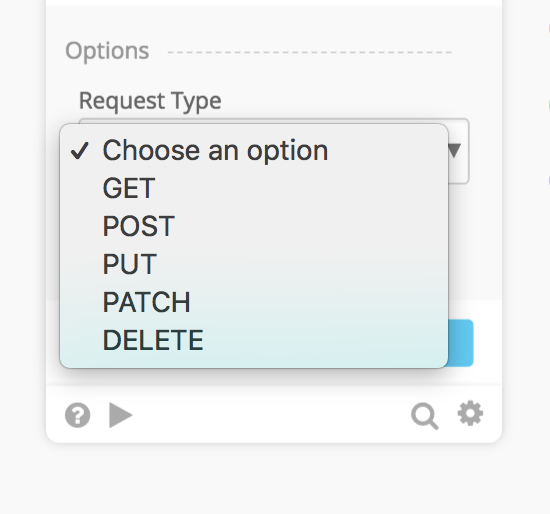
Implement GET, POST, DELETE, PUT, PATCH
Most services on the web implement their API in the form of a REST API. By implementing each of the type of requests above, users are enabled with the tools to create any kind of API query using GET, POST, DELETE, PUT, PATCH.
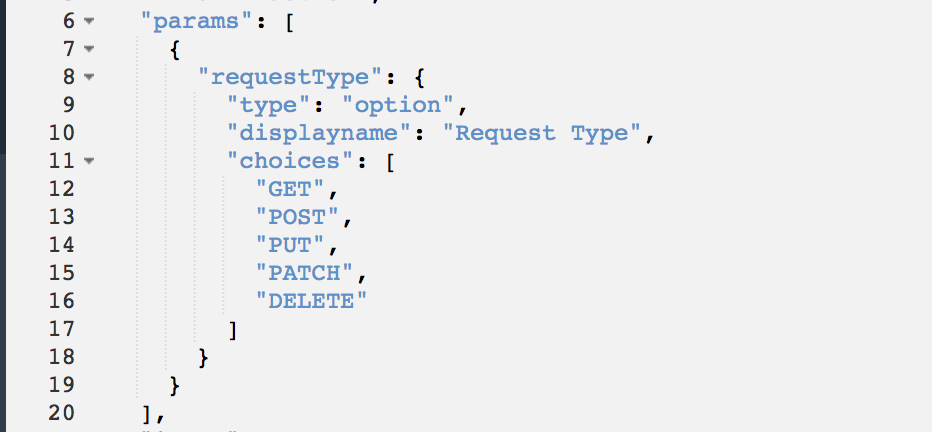
In the connector code these are implemented as a list of options under the parameters of the card. This manifests in the UI as a simple list of values the user can choose from as seen in the image below:
For the Salesforce connector code we would write:
User Fields - Relative URL
When a user creates a custom api action card in their Flow they are provided with three different inputs Relative URL, Query, Header, and Body depending on the option they chose in the beginning.
Below is an example of what the user sees with a GET request vs. a POST, PUT, PATCH, DELETE request:
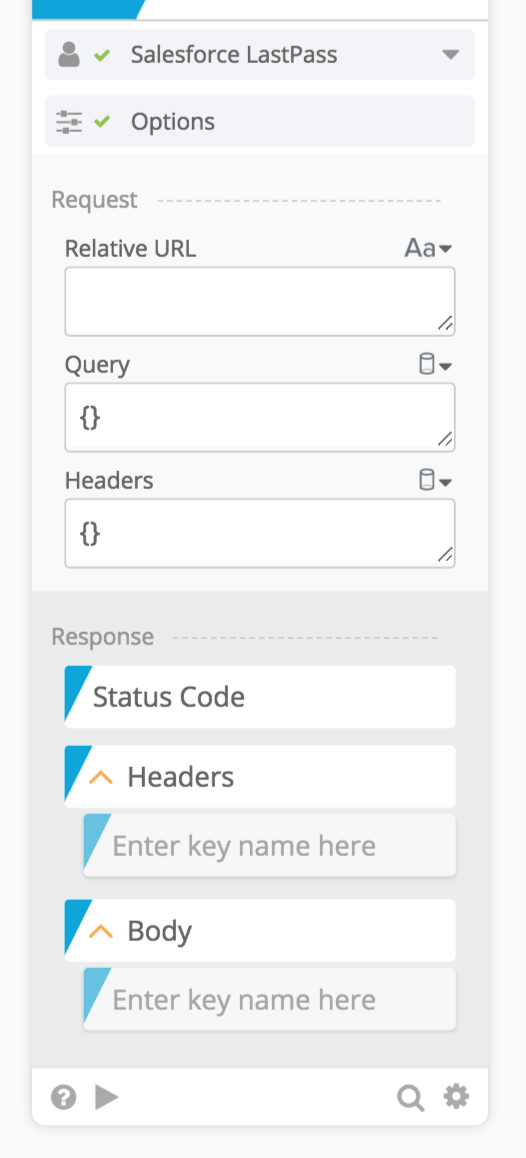
GET Request:
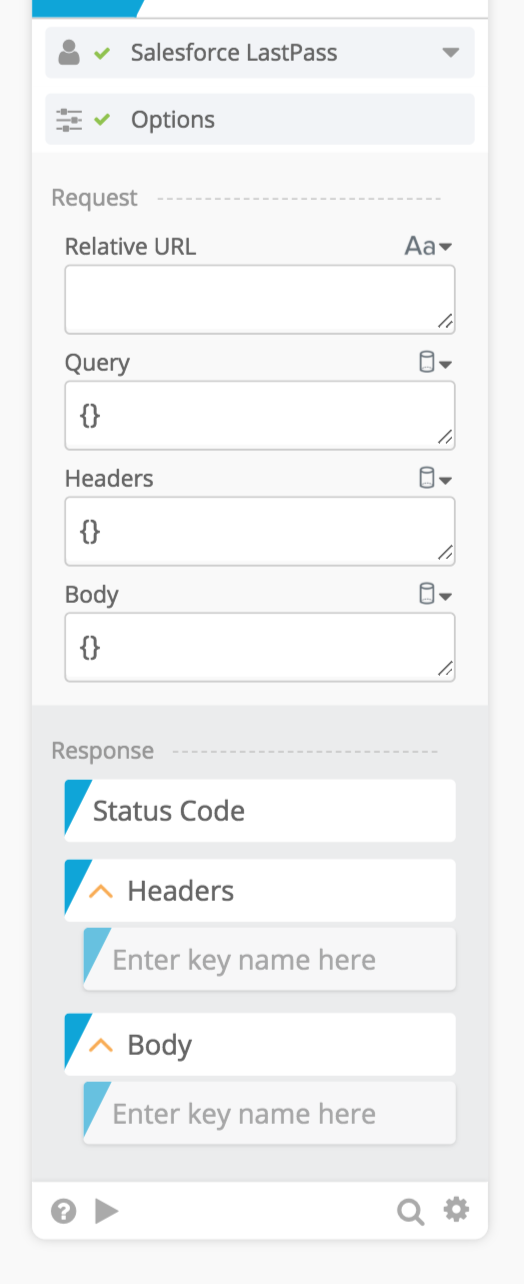
POST, PUT, PATCH, DELETE Request:
 Note that the user fields are different depending on the initial request option. The displayed input fields in the image above are dynamically generated in the getHttpInputs function.
In the custom api action connector code we would write the following snippet:
 Note that the displayed input fields in the previous image are dynamically generated in the getHttpInputs function.
Best practice is that we provide the user a relative url field instead of a full url field. This means that the root URL exists in the connector code while the user provides the rest of the URL to complete the API request.
Users of the custom api action card will also provide queries and headers as a JSON snippet in the other fields provided. In the next section we will discuss the getHttpInputs metadata function in more detail.
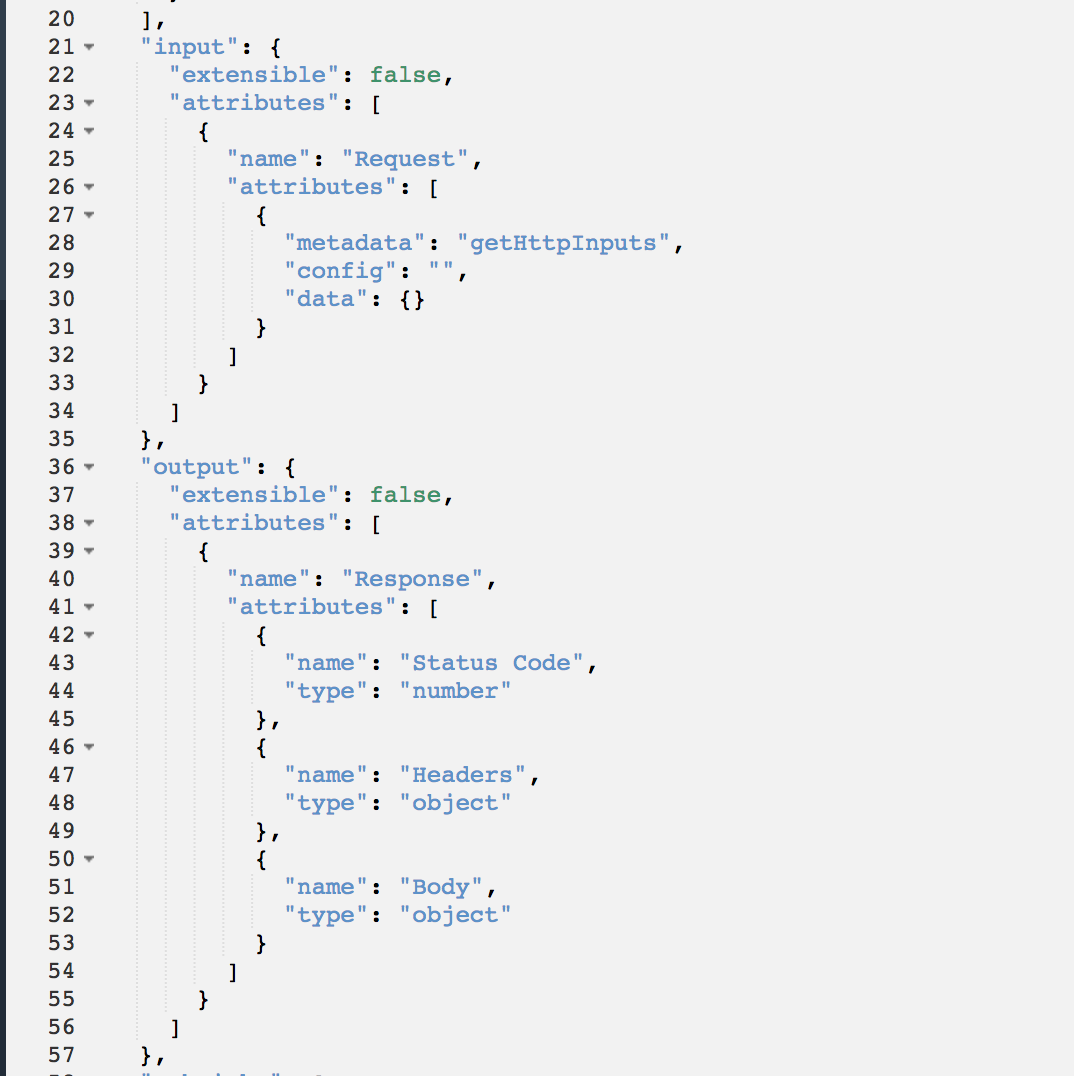
Metadata Function - getHttpInputs
The previous section showed a code snippet that referred to metadata function called getHttpInputs. This function takes care of generating the correct input fields for the UI to consume depending on the type of request that was chosen in the parameter list.
This function should be the same for most custom api action card connectors. Below is a sample snippet of metadata function:
{
  "name": "getHttpInputs",
  "description": "Returns the inputs based on what a user selects for an HTTP verb",
  "kind": "metadata",
  "zebricks": [
    {
      "brick": "control.assignIf",
      "id": "httpInput",
      "inputs": {
        "left-operand": {
          "_availableTypes": [
            "string",
            "number",
            "Date",
            "boolean"
          ],
          "_type": "string",
          "_array": false,
          "_value": "{{input.data.requestType}}"
        },
        "operator": {
          "_type": "string",
          "_array": false,
          "_value": "!="
        },
        "right-operand": {
          "_availableTypes": [
            "object",
            "string",
            "number",
            "Date",
            "boolean"
          ],
          "_type": "string",
          "_array": false,
          "_value": "GET"
        },
        "valueIfTrue": {
          "_availableTypes": [
            "*"
          ],
          "_type": "object",
          "_array": true,
          "_value": [
            {
              "name": "Relative URL",
              "type": "string"
            },
            {
              "name": "Query",
              "type": "object"
            },
            {
              "name": "Headers",
              "type": "object"
            },
            {
              "name": "Body",
              "type": "object"
            }
          ]
        },
        "valueIfFalse": {
          "_availableTypes": [
            "*"
          ],
          "_type": "object",
          "_array": true,
          "_value": [
            {
              "name": "Relative URL",
              "type": "string"
            },
            {
              "name": "Query",
              "type": "object"
            },
            {
              "name": "Headers",
              "type": "object"
            }
          ]
        }
      },
      "outputs": {
        "output": {
          "_type": "object",
          "_array": true
        }
      }
    }
  ],
  "displayname": "getHttpInputs",
  "requestedOutputs": false
}
After the getHttpInputs function gets called in the CustomAPIAction code, we set up the actual request to the api.
Making the API request
The salesforce API uses Oauth 2.0 for authentication. This means that we need to merge the Bearer token into the request headers provided by the authentication section. You might need to merge other values into the header depending on the API.
Under the zebricks you can see that the first step we include is the object.merge brick. This will help us accomplish the goal listed above. You can see how this looks like in the snippet below:
Note that the entire example custom api action code will be included in the bottom of this section.
{
  "brick": "object.merge",
  "id": "headersMerge",
  "inputs": {
    "start": {
      "_type": "object",
      "_array": false,
      "_value": "{{input.Request.Headers}}"
    },
    "sink": {
      "_type": "object",
      "_array": false,
      "_value": {
        "Authorization": "Bearer {{auth.access_token}}"
      }
    }
  },
  "outputs": {
    "output": {
      "_type": "object",
      "_array": false
    }
  }
}
After merging the user inputed headers and the Bearer token we can setup the API request with the http.call brick. In the code snippet below the value field for the url object is highlighted because it is the most likely part to change depending on the api that is being called.
{
  "brick": "http.call",
  "id": "makeAPIRequest",
  "inputs": {
  "url": {
    "_type": "string",
    "_array": false,
    "_value": "{{auth.instance_url}}{{input.Request.Relative URL}}"
  },
  "method": {
    "_type": "string",
    "_array": false,
    "_value": "{{params.requestType}}"
  },
  "filterEmpty": {
    "_type": "boolean",
    "_array": false,
    "_value": true
  },
  "ssl": {
    "cert": {
      "_availableTypes": [
        "string"
      ],
      "_type": "string",
      "_array": false,
      "_value": null
    },
    "key": {
    "_availableTypes": [
      "string"
    ],
    "_type": "string",
    "_array": false,
    "_value": null
    },
    "ca": {
      "_availableTypes": [
        "string"
      ],
      "_type": "string",
      "_array": false,
      "_value": null
    },
    "passphrase": {
      "_availableTypes": [
        "string"
      ],
      "_type": "string",
      "_array": false,
      "_value": null
    }
  },
  "query": {
    "_availableTypes": [
      "object",
      "string"
    ],
    "_type": "object",
    "_array": false,
    "_value": "{{input.Request.Query}}"
  },
  "body": {
    "_availableTypes": [
      "object",
      "string"
    ],
    "_type": "object",
    "_array": false,
    "_value": "{{input.Request.Body}}"
  },
  "headers": {
    "_type": "object",
    "_array": false,
    "_value": "{{headersMerge.output}}"
  }
},
  "outputs": {
  "headers": {
      "_type": "object",
      "_array": false
  },
  "statusCode": {
    "_type": "number",
    "_array": false
  },
  "body": {
    "_type": "object",
    "_array": false
  }
}
Another way that the url could have been setup is by hardcoding the root URL if the subdomain does not change. One example would be if we were implement custom api action for openweathermap api we would want to write the following instead of referencing a different value somewhere else:
"url": {
  "_type": "string",
  "_array": false,
  "_value": "api.openweathermap.org/data/{{input.Request.Relative URL}}"
}
As a best practice we try to allow the user choose the version of the API they want to call in the relative URL input field. If we look at openweathermap example above we have:
* "_value": "api.openweathermap.org/data/{{input.Request.Relative URL}}"
Instead of:
* "_value": "api.openweathermap.org/data/2.5{{input.Request.Relative URL}}"
In some cases this will not be possible because of some APIs will only allow a user to authenticate through one version of their API service.
Unit Tests
Unit tests are required to ensure that the API requests perform as expected. Make sure to refer to the quick-start connector template for a set of sample unit tests. Refer to document here: here
What needs to be tested?
- For REST APIs, please include at least a GET request, a POST request, a PATCH/PUT request, and a DELETE request in the unit test
- For SOAP APIs, please include several different operations (add, get, delete) in the unit test
- Please also unit test dynamically generated input/output metadata functions. For example: getHttpInputs medatada function
- A good way of doing it to make the unit test self-contained is: create a record using POST request or add operation, read the newly created record using GET request or get operation, update the newly created record using PATCH/PUT request or update operation, read the newly created record using GET request or get operation to verify data is updated successfully, and finally delete the newly created record using DELETE request or delete operation
- When testing GET request, make sure you test the Query input field
How to build the unit test?
- To create a unit test, select “Unit Tests” and then select “Add Test”
- Once you’ve filled in the name of your test, and created it, you’ll see two modules pop-up: “Control.Spawn” and “Assert.isEqual”
- In our case, you need to fill in the name of the Custom API Action in the “Control.Spawn” module, and also provide the parameters and inputs
- The parameters and inputs are different based on which kind of HTTP request (GET/POST/DELETE/PATCH/PUT) or SOAP operation (get/add/others) you are testing
- Please add a valid configId (e.g. “configId”: 17155) to the end of the test, then the connection is automatically created for whoever wants to run the unit test
- You can find the configId of a valid connection in the designer: Settings ⇨ Connections. Find the connection you previously created or create a new one, hover over the connection name, and you can see the ID
How to run the unit test?
- Simply click “Run” while inside of a unit test, it will run that test, and output logs in the log window
- In the logs for that unit test, you’ll see either red errors, or green successes and a summary below all logs that displays the total number of successes and failures.